
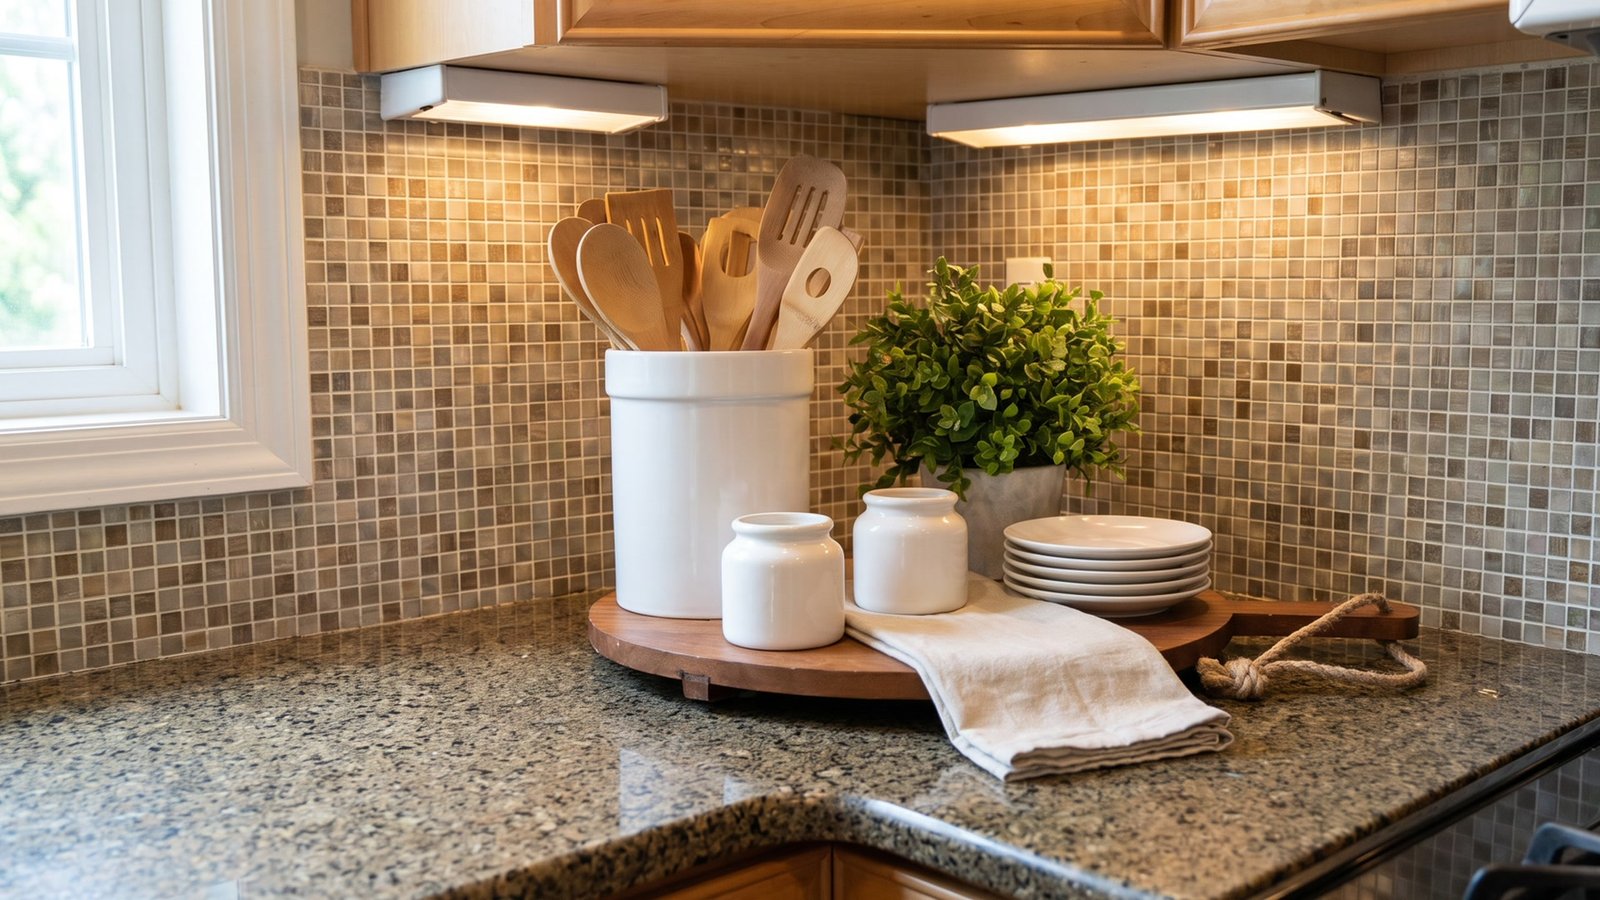
The kitchen counter is where everything lands. Mail, keys, the blender you used once, a bag of bread that never made it to the pantry.
And it’s annoying, because the counter is also the first thing you see when you walk in. If it’s a mess, the whole kitchen feels like a mess.
I get it. You clean it on Sunday and by Tuesday it’s back to chaos.
The fix usually isn’t more storage. It’s giving the things you use every day a proper spot, and making that spot look like you meant it.
Most of these cost less than a takeout dinner. A tray, a couple of jars, maybe a plant, and things start to look a lot calmer.
That’s what this list is about. Trays, coffee corners, soap setups, and a bit of greenery.
Here are 20 ideas. Steal one or two. You definitely don’t need all of them.
Trays that keep the basics together
1. Rae Dunn inspired kitchen counter corner
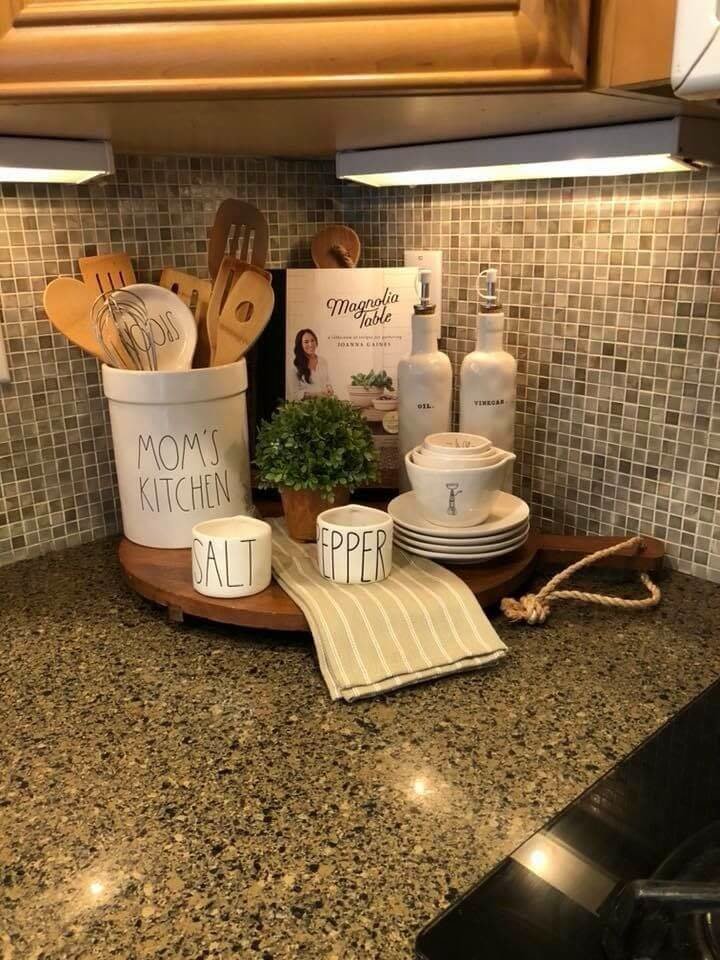
Corners are where clutter likes to hide. So give the corner a job.
Picture a round wooden board with a big white canister full of wooden spoons. Next to it, matching salt and pepper jars, a stack of small plates, a cookbook leaning against the wall, and a little plant.
Everything there gets used. That’s why it works.
The farmhouse letter-print canisters are what give it the look. “Salt” and “pepper” in that skinny black font, you know the ones.
I’d recommend a lazy Susan instead of a flat board if you can find one. You spin it and grab what you need without moving three things first.
And if you don’t love the farmhouse look, the same setup works in plain white or black. It’s the grouping that matters, not the brand.
Just keep the stack of plates small. Four is cute, twelve is a cupboard you forgot to put away.
2. Keep the basics together on one tray
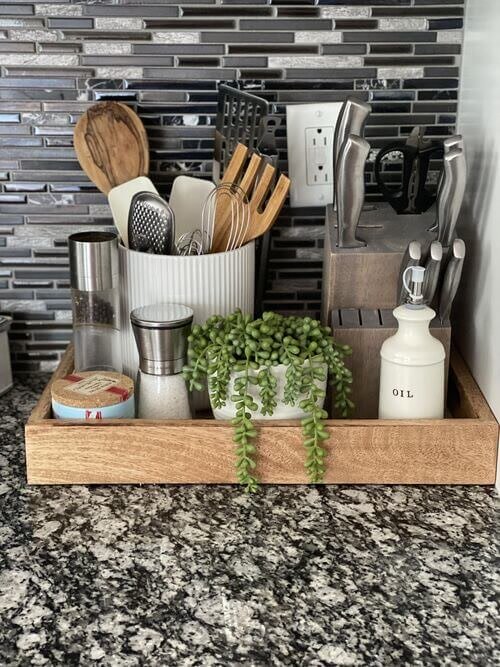
This is the simplest idea on the list. And honestly, maybe the most useful.
Put a long wooden tray right behind the stove. Add a crock with your spatulas and spoons, a salt shaker, an oil bottle, and a small trailing plant.
When you cook, everything is right there. When you’re done, it still looks tidy.
The trailing plant does a lot of work here. A string of pearls spilling over the edge softens all that hard granite and metal.
The thing is, a tray makes cleaning way easier. You lift one thing, wipe, and put it back.
You can also switch up what’s on it with the seasons. Swap the plant for a mini pumpkin in fall, and nobody will know you barely changed anything.
Don’t park it too close to the burners though. Wood trays and plastic handles do not love direct heat.
3. Black tray with condiments and decor
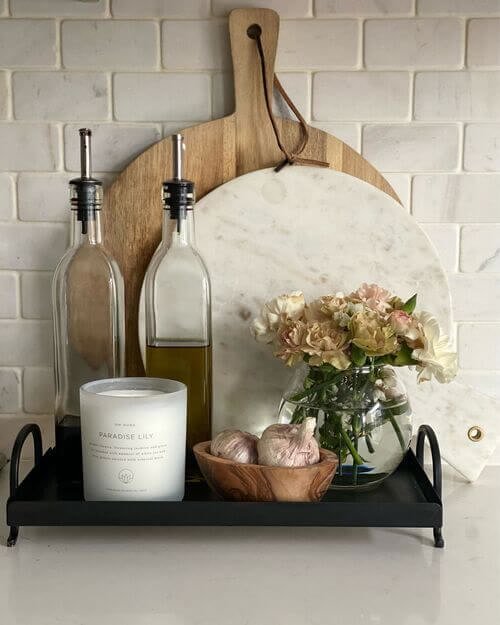
If your kitchen is all white, a black tray adds some edge. It makes everything on it look a bit more styled.
Put your olive oil and vinegar in matching glass bottles. Add a candle, a little wooden bowl of garlic, and a small jar of flowers.
Then lean a couple of cutting boards behind it. A wood one and a round marble one look great together.
The garlic bowl is my favorite part. It’s useful, it’s real, and it looks kind of fancy for something that costs a dollar.
You might want to swap the garlic for chilies or lemons, depending on what you actually cook with. Keep what you reach for.
If you’re worried about the black looking too harsh, pick a tray with a thin gold handle or rim. It warms the whole thing up.
Wipe the bottles once a week. Oily fingerprints on glass show up fast against a black tray.
4. Copper and wood utensil tray
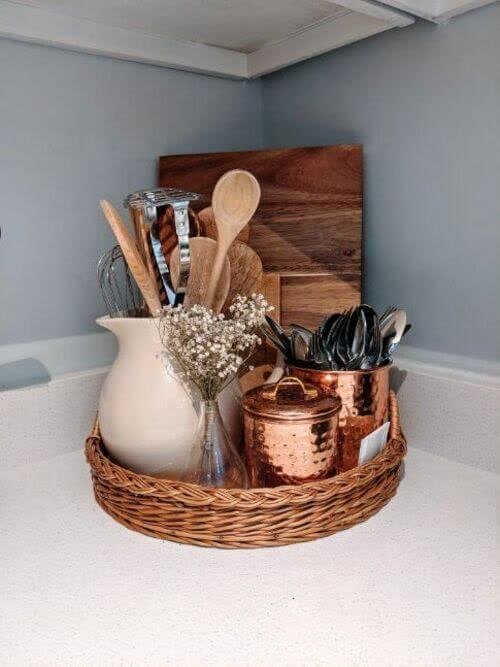
Copper is one of those things that makes a kitchen feel warm right away. Even one or two pieces is enough.
Set a round woven tray on the counter. Put a white pitcher full of wooden spoons in it, then copper canisters holding your whisks and tongs.
Add a tiny vase of baby’s breath for something soft. Then lean a wooden cutting board against the wall behind it.
It’s a mix of white, wood, and copper. Those three just get along.
One tip, pick copper that has a clear shiny coating on it. Plain copper goes dark and spotty pretty fast near a sink.
Got a black or white kitchen? Copper works with both. It’s one of the few metals that never looks out of place.
And don’t overfill the pitcher. If you have to wrestle a spoon out, it’s too full.
5. Silver basket condiment stand
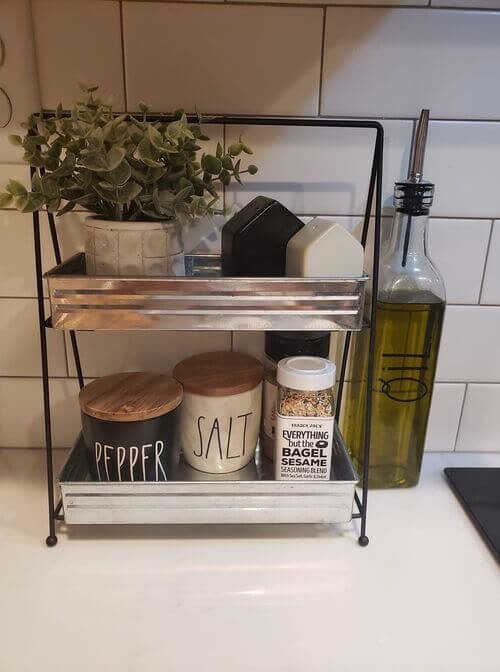
This one’s for the people who actually cook every night. Everything you season with, in one spot.
A two-tier metal stand with galvanized baskets holds a lot more than you’d think. Salt and pepper canisters with wooden lids on one shelf, your favorite seasoning blend next to them.
Put a small potted plant on the top tier. Keep the olive oil bottle right beside the stand.
The two tiers are the secret. You get double the space on the same patch of counter.
If you grow herbs, swap the plant for basil or mint. Then it’s decor and dinner.
Many people find the bottom tier turns into a junk drawer. So give it a clear job, like oils only, and stick to it.
Measure the gap under your upper cabinets first. Tall stands look squished if they almost touch the cabinet.
Coffee and tea corners
6. Hanging bar for cups and plants
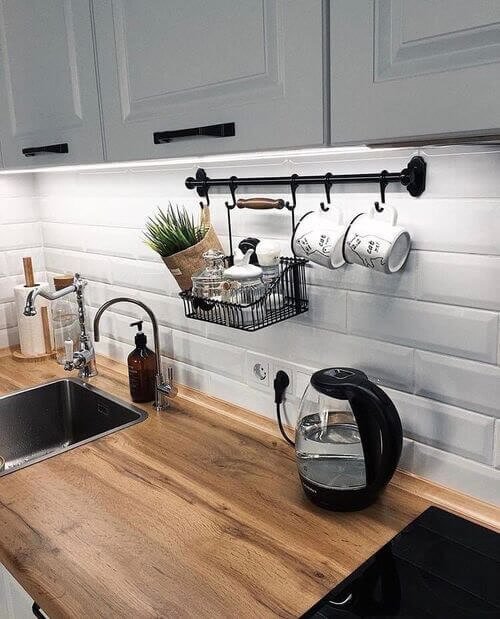
Short on counter space? Then use the wall.
Mount a slim rail under the cabinets or on the backsplash. Hang your mugs from hooks and add a small wire basket for a plant and a couple of jars.
The kettle and coffee stuff sit right below. So your coffee setup takes up almost zero counter space.
It’s such a good trick for small apartments. The counter stays clear, and the mugs become decor.
Think about what else could hang there too. A small towel, a pair of scissors, even a little bunch of dried herbs.
Pick a rail with S-hooks so you can slide things around later.
Fair warning, renters should check before drilling into tile. Some rails come with adhesive mounts, but heavy mugs plus sticky tape is a gamble.
7. Simple coffee nook
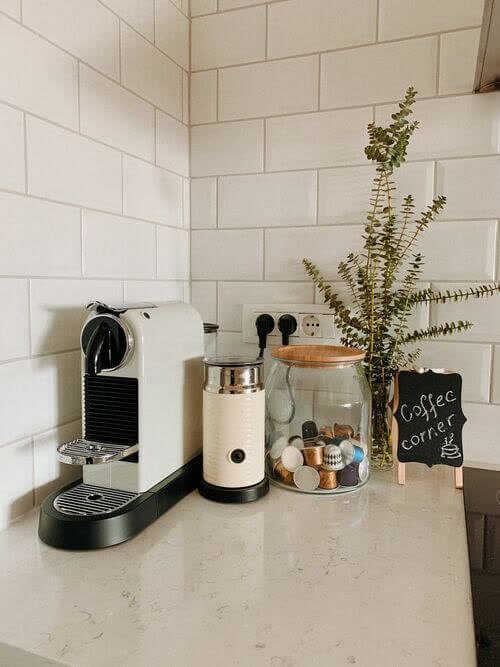
You don’t need a whole coffee bar. What I mean is, you really only need three things.
A coffee machine, a milk frother, and a glass jar full of coffee pods. That’s pretty much it.
Add a sprig of greenery in a little vase and a tiny chalkboard sign if you want. Something like “coffee corner” makes it feel cozy and a bit funny.
The glass jar is the part that makes it look nice. Pods in a box look messy, pods in a jar look like you planned it.
If you have a little more room, add a tray under the machine. It catches drips and makes the corner look more pulled together.
Keep the nook near an outlet, obviously. Extension cords snaking across the counter undo all your hard work.
Refill the jar before it’s empty. A half-full jar of pods looks great. An empty one just looks sad.
8. Countertop tea corner
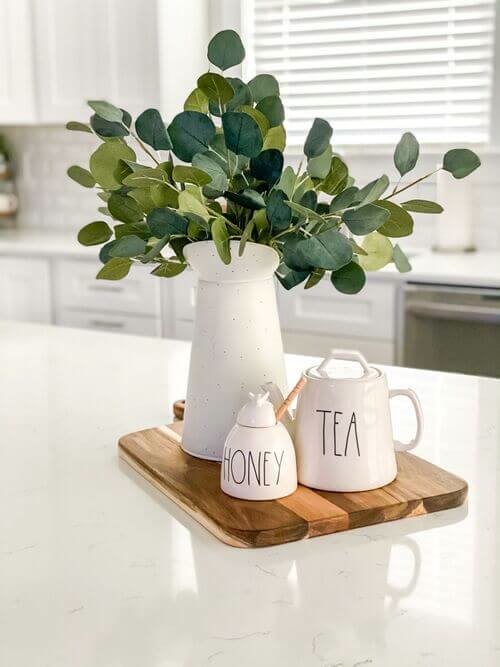
Tea people, this one’s for you. It’s small, it’s sweet, and it takes about two minutes to set up.
Place a wooden board on the counter. Add a tall white vase of eucalyptus, a ceramic tea canister, and a matching honey pot.
That’s the whole thing. And it looks so calm.
The eucalyptus is doing the heavy lifting here. Tall greenery gives a small setup some height so it doesn’t disappear.
You could try adding a small jar of tea bags or loose tea to the board. Then the whole tea routine lives in one pretty spot.
Faux eucalyptus works fine if real stems dry out too fast in your kitchen. Nobody can tell from across the room.
Keep the honey pot away from the stove. Warm honey runs, and sticky boards are the worst to clean.
9. Make the coffee nook part of the decor
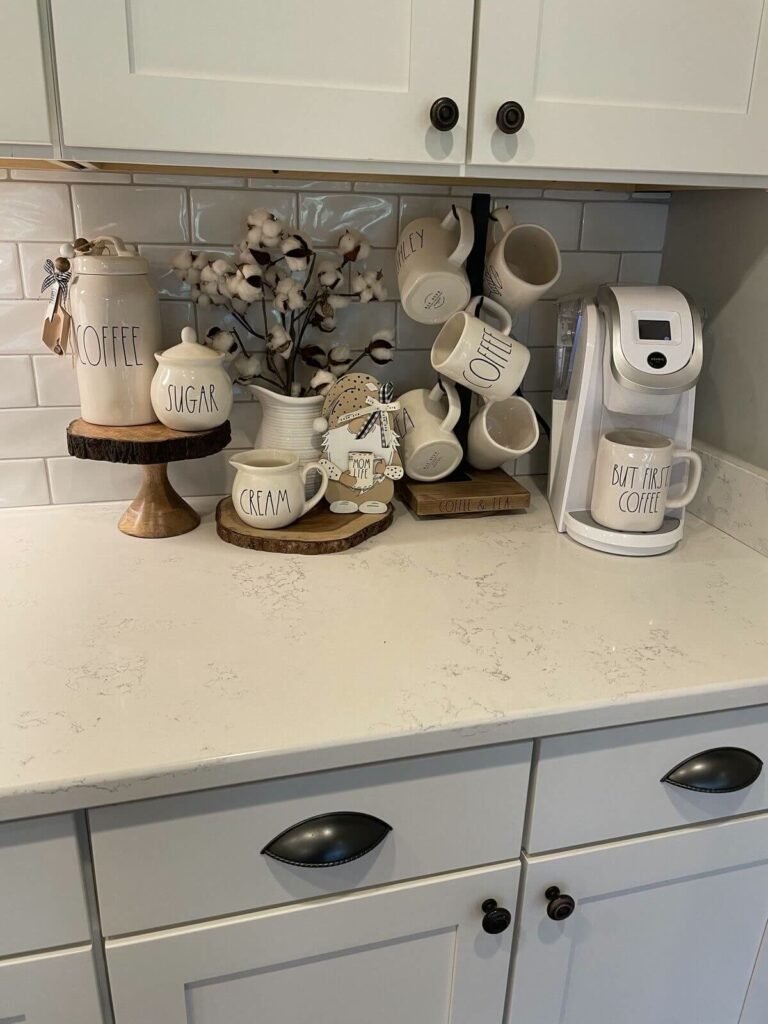
Instead of hiding the coffee maker, style around it. Make it look like it belongs.
Put your coffee and sugar canisters on small wooden stands so they’re at different heights. Add a mug tree or a mug rack, and a little vase of cotton stems.
Suddenly the coffee machine is the center of a cute little scene. Not an appliance you’re embarrassed about.
It seems to me different heights are the whole trick here. Flat rows look like a store shelf. Stacked levels look styled.
Cotton stems are a sweet choice here because they look cozy all year. You can swap in fresh flowers on weekends.
You could try mixing in a cookbook or a small framed print behind everything. Something personal makes it yours.
Just leave room to open the machine lid. Sounds obvious, but people forget, then they move everything every morning.
10. Perfectly packed coffee nook
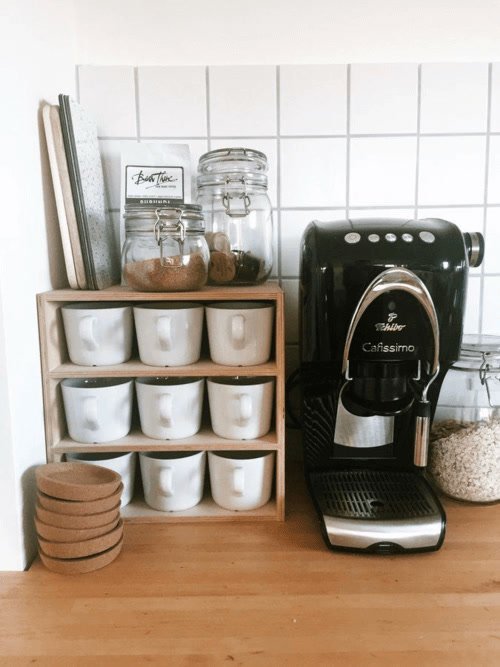
If loose mugs and random jars drive you nuts, this one will make you very happy.
Use a wooden mug holder with little cubbies. Every white mug gets its own spot.
Put your coffee, sugar, and tea in glass jars on top of the mug holder. Then stack some wooden coasters next to the coffee machine.
Matching mugs make it look super clean. Mismatched mugs in cubbies still look organized, so don’t stress if yours don’t match.
Imagine guests coming over and just grabbing a mug themselves. That’s the vibe this setup gives off.
The coasters are a nice touch too. You’ll actually use them when they’re right there.
Measure your mugs before you buy one of these. Big mugs and small cubbies are not friends.
Right by the sink
11. Wooden tray for dish soaps
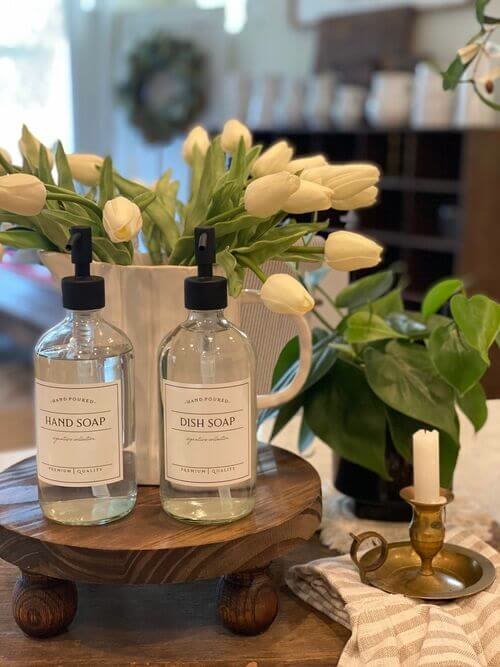
The area by the sink is usually the messiest spot in the kitchen. Soap bottles, sponges, a scrubber that’s seen better days.
So put the soaps on a stand. A round wooden one with little feet looks so much nicer than bottles sitting in a puddle.
Use matching glass pump bottles for hand soap and dish soap. Add a vase of tulips or a little candle beside it.
Believe it or not, the matching bottles make the biggest difference. Brand labels in neon colors are what make a sink look cluttered.
Refill bottles from a big jug of soap you keep under the sink. It’s cheaper, and nobody sees the ugly jug.
I’d recommend a stand with feet, not a flat tray. Water drains underneath instead of sitting there.
Dry it off once in a while. Wood that stays wet all week will warp and get spotty.
12. Little wooden box dish soap holder
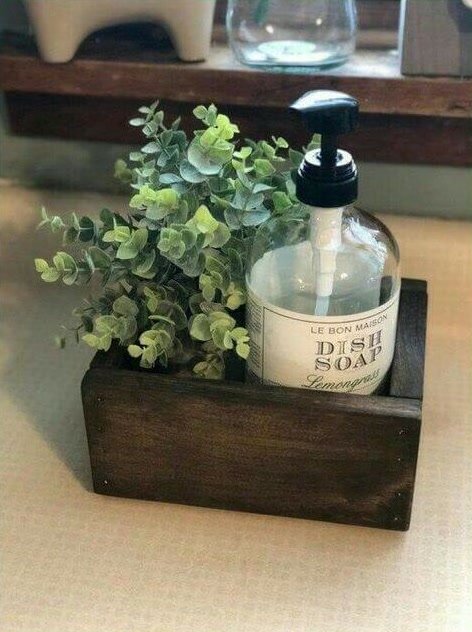
Want something smaller? A little wooden box does the trick.
Drop your dish soap bottle into a dark wood box. Tuck some faux eucalyptus or greenery next to it.
That’s it. It hides the bottle’s boring bottom half and adds a bit of green.
It doesn’t take up much space, which is perfect for tiny sinks. And it looks kind of rustic and cozy.
If you like DIY, this box is an easy weekend build. Four pieces of scrap wood, a little stain, done.
You could also tuck a sponge or a brush in the back where nobody sees it.
Line the box with a small piece of shelf liner. Soap drips will stain bare wood over time.
13. Kitchen sink tray with soap and towels
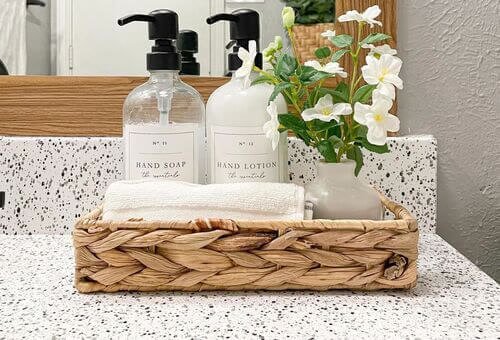
A woven tray next to the sink keeps everything you need for clean hands in one spot.
Set a hand soap and a hand lotion side by side. Roll up a small white towel in front, and add a little vase of white flowers.
It makes the sink feel like a spa. Even if you just finished scrubbing a lasagna pan.
The thing is, the rolled towel is the detail people notice. It’s so simple but it makes the whole tray look finished.
Want it even more useful? Add a small dish for your rings so they don’t end up down the drain while you wash up.
Woven seagrass trays are pretty cheap, and they come in lots of sizes. Get one that fits between the faucet and the edge.
Swap the towel often. A damp towel sitting in a tray gets musty fast.
14. Soap pump on a mini wooden riser
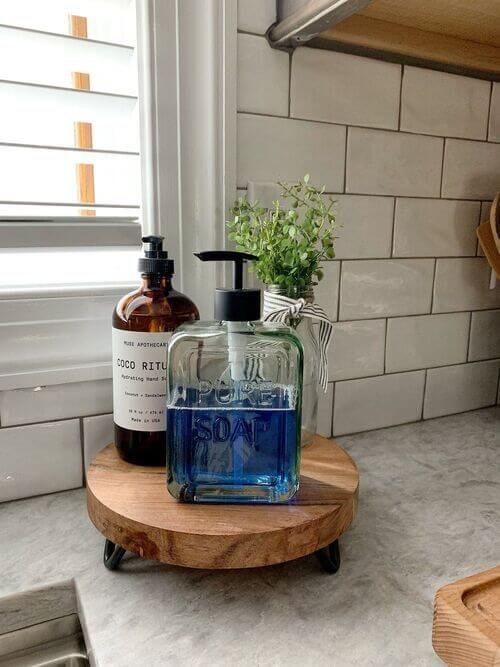
Mini wooden risers are such a cheap little upgrade. You’ll want them everywhere.
Put your dish soap and a hand soap on a small round riser with legs. Add a little plant behind them.
The riser lifts everything off the wet counter. So the bottles don’t leave rings.
A colorful soap looks cute here too. Blue soap in a clear glass bottle is kind of a fun pop of color.
Get two if your counter is long. One for soap by the sink, one for a plant or candle at the other end so it feels balanced.
You can use the same riser idea for a potted herb or a candle on another counter. They’re handy all over the house.
Pick one with a sealed finish. Raw wood next to a sink starts looking tired after a couple of months.
Boards, greenery, and a little sunshine
15. White and wood utensil corner
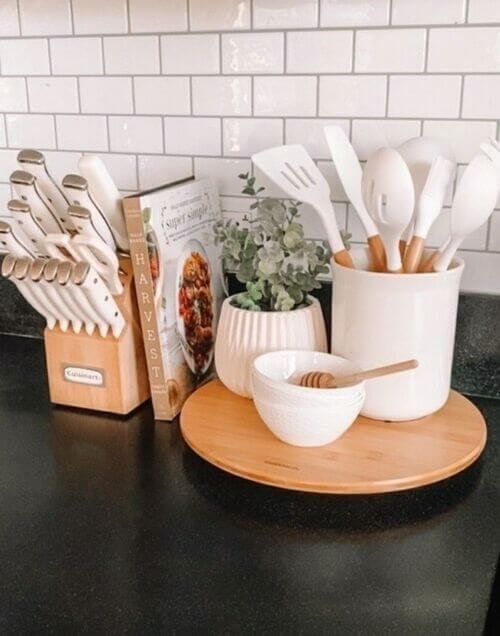
Want a bright, clean look? Stick to two colors, white and wood.
Set a round wood board in the corner. Add a white crock of white utensils, a small bowl with a honey dipper, and a little potted plant.
Put a cookbook upright behind it. It fills the corner and gives you something to cook from.
Keeping the colors simple makes it look calm. Even with a lot of stuff on it.
If you want a little more color, a wooden honey dipper or a few wooden bowls keep the look warm without breaking the two color rule.
Succulents work great here because they hardly need water. You’ll forget about them and they’ll be fine.
Don’t buy a utensil set just because it’s white. Make sure the spatulas are actually good to cook with.
16. Summer lemons on your kitchen counter
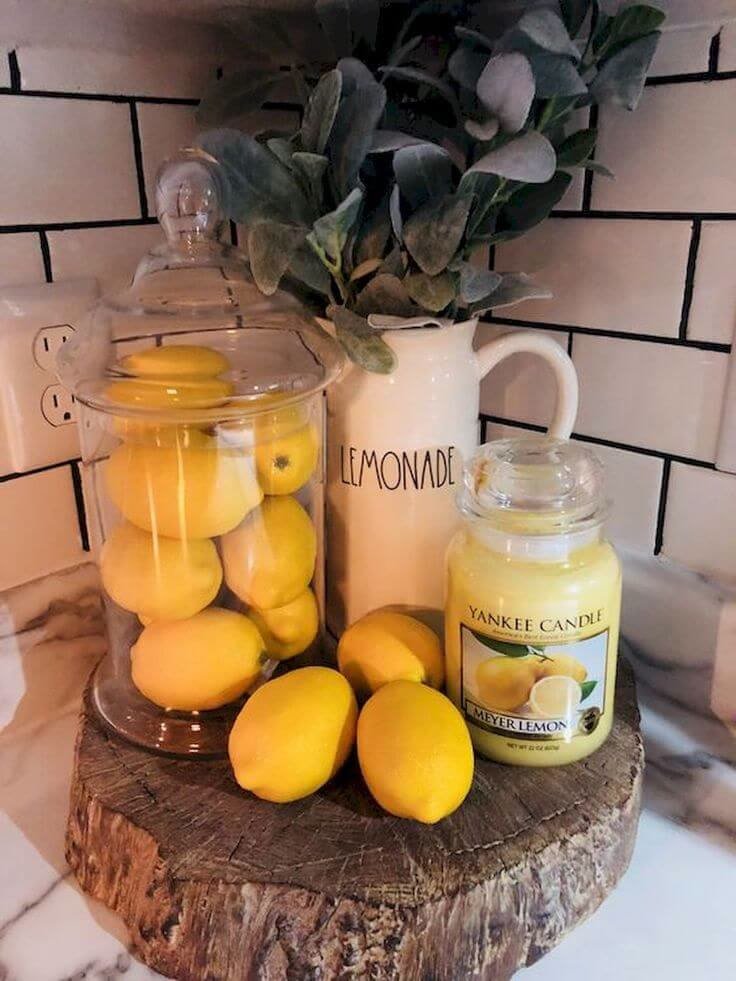
Lemons are the easiest way to make a kitchen feel happy. Seriously, it’s instant.
Put a tree slice stand on the counter. Add a big glass jar full of lemons, a lemon scented candle, and a white pitcher with eucalyptus.
Then scatter a few loose lemons around the base. It looks fresh and a little playful.
It’s a summer look, I know. But nobody’s stopping you in March. The yellow brightens up gray days too.
In the fall you can swap the lemons for small oranges or apples. Same jar, same setup, totally new season.
Use real lemons if you’ll actually cook with them. Fake ones are fine if you won’t.
Check the lemons every week. One moldy lemon in a jar ruins the whole thing.
17. Wood board with baby’s breath
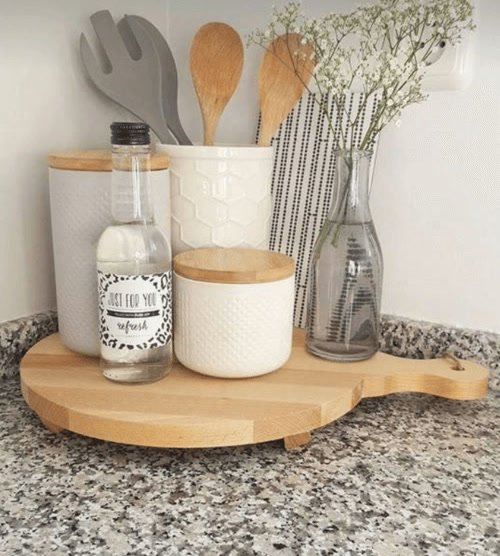
Flowers on the kitchen counter make the whole room feel fresher. Even small ones.
Use a round wooden board with a handle. Set a couple of white canisters on it, a crock of wooden spoons, a glass bottle, and a tall vase of baby’s breath.
Baby’s breath is great because it’s tiny and airy. It fills space without blocking anything.
It also dries beautifully. So when it stops looking fresh, it still looks pretty.
Did you know baby’s breath can last weeks once dried? Just hang it upside down for a few days before you put it back in the vase.
A paddle-style board is nice because you can grab the handle and move the whole thing when you clean.
Keep the vase water fresh. Old flower water starts to smell, and it’s the kitchen.
18. Simple greenery and a little clock
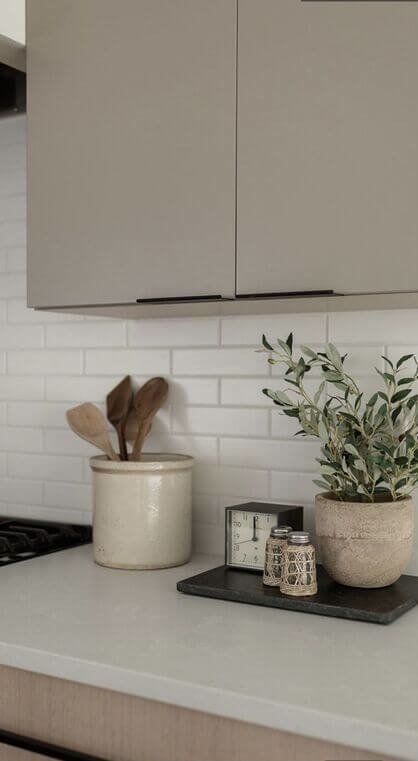
Minimalists, this one’s for you. Very little stuff, still looks finished.
Put a dark slate board on the counter. Add a small clock, little salt and pepper shakers, and a potted olive plant.
Then set a crock of wooden spoons nearby. That’s all.
Trust me, the clock is such a fun touch. It’s useful, it’s a bit vintage, and you’ll actually look at it while cooking.
This setup is great for renters too. Nothing to drill, nothing to hang, and it all packs into one box when you move.
A faux olive tree looks real if you don’t have bright light. Real ones need a sunny window.
Don’t add more. The whole point is the empty space around it.
19. Wooden tray and greenery board
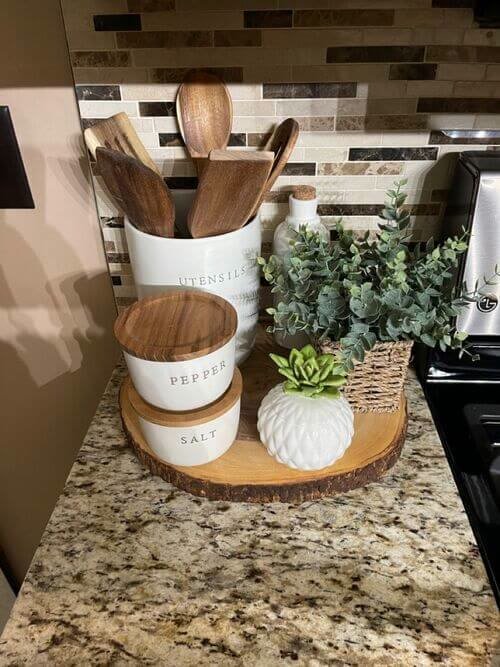
Lots of wood and white can look a bit flat. Greenery fixes that.
Set a round wooden lazy Susan near the stove. Add salt and pepper cellars with wooden lids, a crock of spoons, and a small succulent in a white pot.
Tuck a little basket of faux greenery right next to it. It brings in color and softens everything.
The salt cellars are great because you can pinch from them while cooking. No shaking.
A lazy Susan really is the hero here. You spin it and everything comes to you, which is so handy when your hands are messy.
I suggest one plant on the board and one next to it. Two layers of green look fuller.
Keep it a few inches away from the burners. Plants and wood both hate heat.
20. Wooden boards in a rustic flower tray
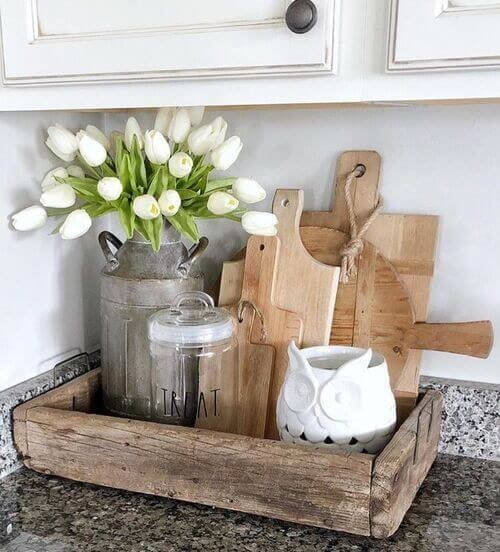
Got a bunch of cutting boards with nowhere to go? Turn them into decor.
Put a rustic wooden crate tray on the counter. Lean your boards against the back of it, big ones behind and small ones in front.
Add a metal milk can with white tulips, a glass treat jar, and something cute like a small ceramic owl.
What I mean is, the boards stop being clutter. They look like part of the display.
And if you don’t have a crate, an old drawer works just as well. Thrift stores are full of them for a few dollars.
Tulips are lovely here, but any flowers work. Grab whatever’s in season.
Just make sure the boards are dry before you lean them back. Wet boards stuck against wood can get moldy.
That’s pretty much the list
You don’t need twenty new things on your counter. You need the right two or three.
Messy sink? Start with a soap tray. Coffee chaos? Make a coffee nook. Counter looks empty and cold? Add one plant and a wooden board.
Most of these ideas use stuff you already own. A board, a jar, a plant from another room. Start there before you buy anything new.
Pick the spot that bugs you the most and fix that one first. Then see how you feel.
So which corner of your kitchen are you starting with?