
You bought the clay. Maybe a big white block of air-dry clay, maybe a little rainbow pack of polymer. And now it’s sitting in a drawer because you have no idea what to actually make with it.
I get it. Clay feels like one of those hobbies where everyone else seems to know some secret. You squish it, it looks lumpy, you put it back in the bag.
But here’s the thing. Most of the cute stuff you see online is just a few simple moves repeated over and over.
Roll it, press it, pinch it, let it dry, paint it. That’s pretty much the whole toolbox, and you already have most of what you need in the kitchen drawer.
So this list is all about weekend-sized projects. Nothing that needs a kiln, nothing that takes a month. Just things you can start on Saturday and show off by Sunday night, or Monday if your clay is slow to dry.
A quick word on clay before we start. Air-dry clay dries on its own in a day or two and is great for most of this list. Polymer clay needs a quick bake in your home oven, and it’s tougher, so it’s better for things that get handled a lot.
I’ve split the ideas into four groups. Little things that live around the house, magical projects the kids will fight over, keepsakes and gifts, and pieces you hang on a wall or window.
You don’t need to try all fifteen. Pick one that makes you smile and start there.
The Simple Kit You’ll Need for Most of These
You don’t need a craft store haul for this. A rolling pin, a butter knife or craft knife, a few toothpicks and a small cup of water will cover almost everything here.
Add some cookie cutters if you have them, plus a straw for poking holes. Acrylic craft paint, a couple of cheap brushes and a clear sealer finish the job.
Work on a sheet of parchment paper or a cheap placemat. Clay sticks to wooden tables and leaves marks, and parchment lets you lift your piece without stretching it out of shape.
Keep a damp cloth nearby, too. A quick wipe smooths cracks and fingerprints, but too much water turns the clay into mush, so go easy.
And keep the unused clay wrapped tight in plastic while you work. It dries out faster than you’d think, especially on a warm day.
Small Clay Pieces You’ll Actually Use Around the House
1. Simple Trinket Dishes
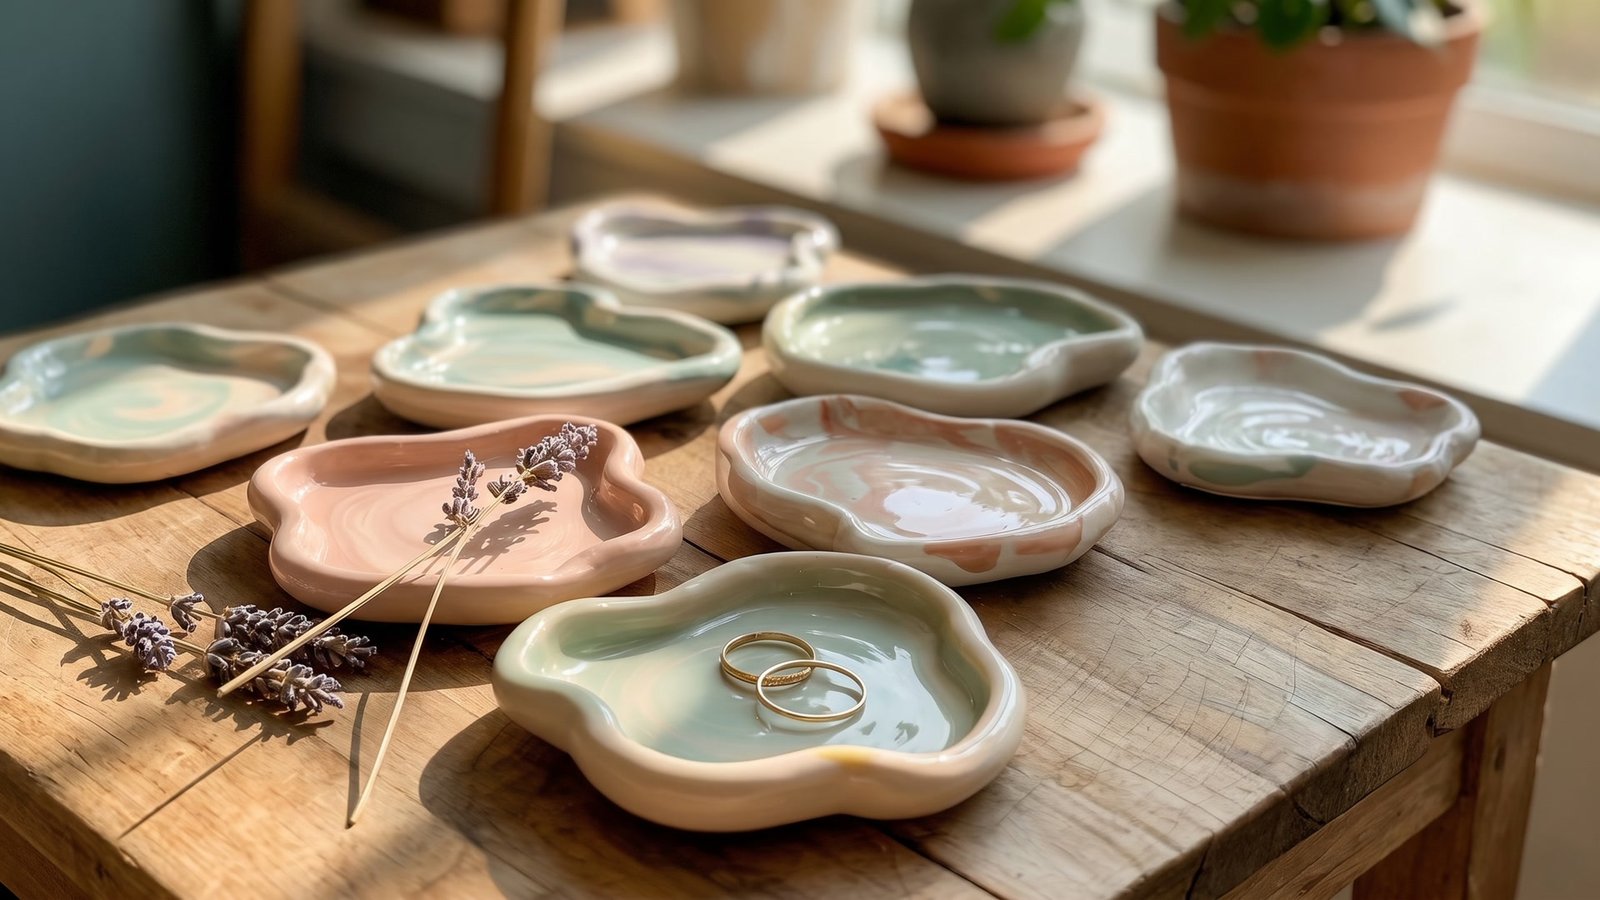
You know the spot. The bathroom counter or the nightstand where rings, earrings and hair ties just pile up loose. A tiny trinket dish fixes that in one afternoon.
Roll out a slab about as thick as a pancake, cut a circle or a wobbly cloud shape, then lift the edges a little with your fingers. Smooth the rim with a damp fingertip so it doesn’t look ragged.
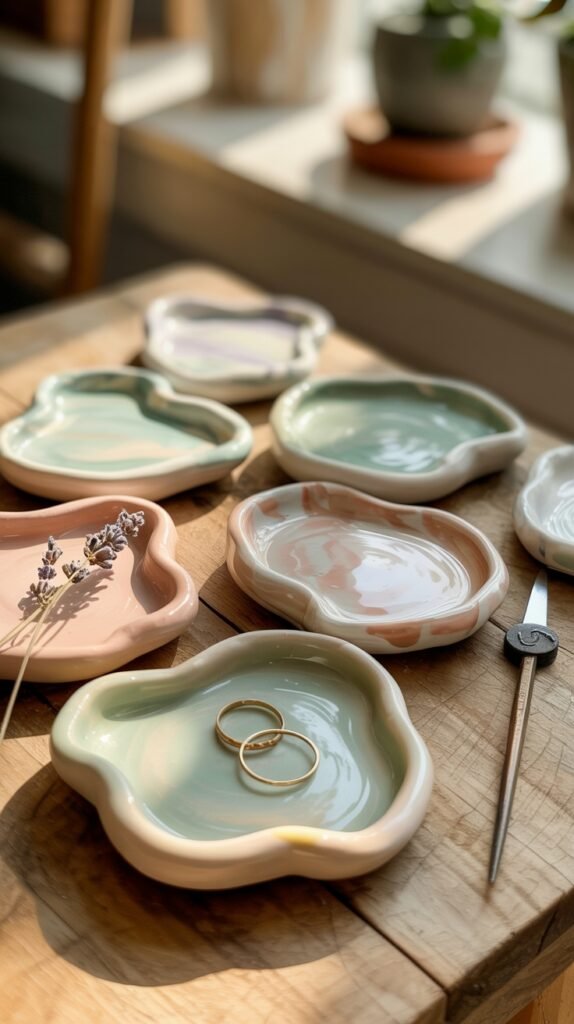
To get a nice shallow curve, let it dry draped inside a cereal bowl. Honestly, that one trick makes homemade dishes look way less homemade.
Once it’s dry, paint it soft pastels or marble it with two colors swirled together. A coat of clear glossy sealer makes it shine like the ones in little gift shops.
Want a little texture? Press a leaf, a bit of lace or the back of a pretty spoon into the clay before you cut the shape. It gives the dish a pattern without any painting skills at all.
Just a heads up, air-dry clay isn’t waterproof. Keep these for rings and keys, not for soap or anything wet.
2. Miniature Animal Planters
If you’ve got a windowsill full of plain plastic pots, this one’s for you. Think a sleepy fox, a round owl or a cat with its eyes closed, each holding a tiny succulent.
Start with a ball of clay about the size of a tennis ball. Push your thumb into the middle to make the hollow, then pinch out ears, a snout or a tail from the same lump so nothing falls off later.
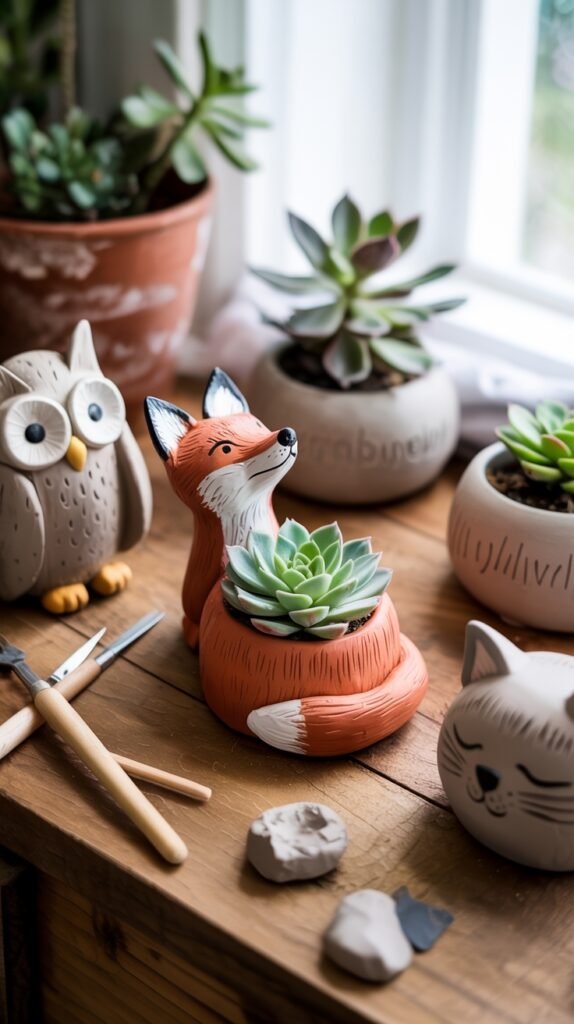
Add the face with a toothpick and a little paint once it’s dry. Simple dots for eyes and a curved line for a smile look sweeter than anything detailed, trust me.
If you’re adding extra bits like a fluffy fox tail, scratch little lines on both surfaces and add a drop of water before pressing them together. Clay sticks to clay much better when it’s roughed up first.
Now the caution, and it’s a big one. Air-dry clay softens when it gets wet, so don’t water straight into it. Slip a small plastic nursery pot inside, or seal the inside really well with a waterproof sealer, and stick to succulents that barely need a drink.
3. Geometric Pencil Holders
A desk full of pens rolling around drives me a little crazy. These chunky geometric holders give them a home and look kind of modern at the same time.
Roll your clay flat and even, then use a ruler and a craft knife to cut squares or triangles. Press the edges together like a little box and smooth the seams on the inside with a damp finger.
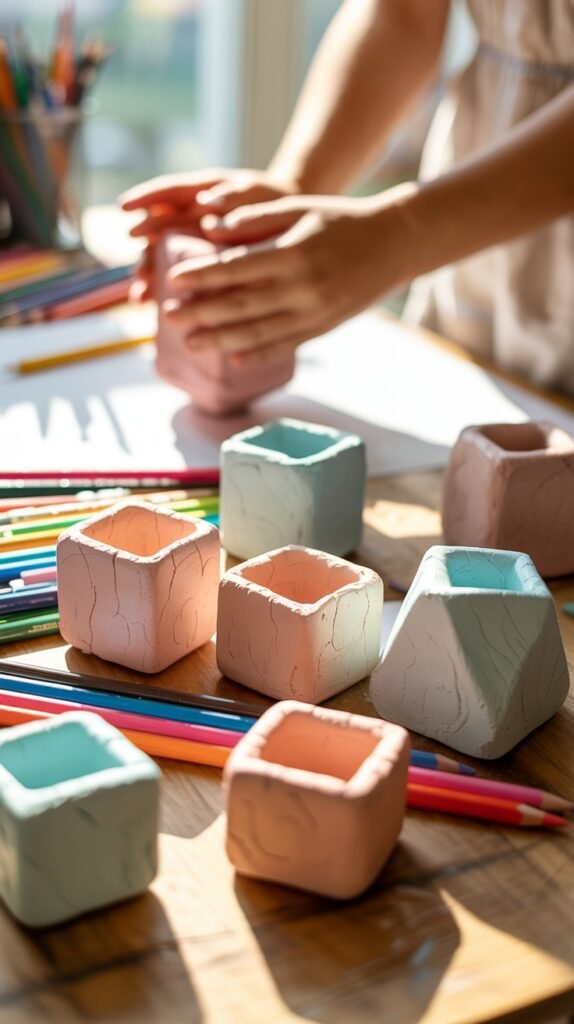
You could leave them plain white for a clean look. Or paint soft pinks and mint greens like the ones in the photo, which look really pretty all lined up together.
The easy cheat is to wrap your clay around a small box or a cut-down milk carton. The shape stays sharp and you don’t have to fight with corners that keep sagging.
Make the walls a bit thicker than you think. Thin walls warp while drying, and then your cube leans like it had a long day. Also let it dry slowly away from a heater so the corners don’t crack.
4. Apple Pinch Pots
These are the cutest little catch-alls. Each one looks like a shiny apple, and you can use the open bowl for paper clips, rings or tea bags.
Roll a ball, press your thumb in the middle and pinch the walls up and around while you turn it. Keep the shape round and a little squat, like a real apple sitting on a table.
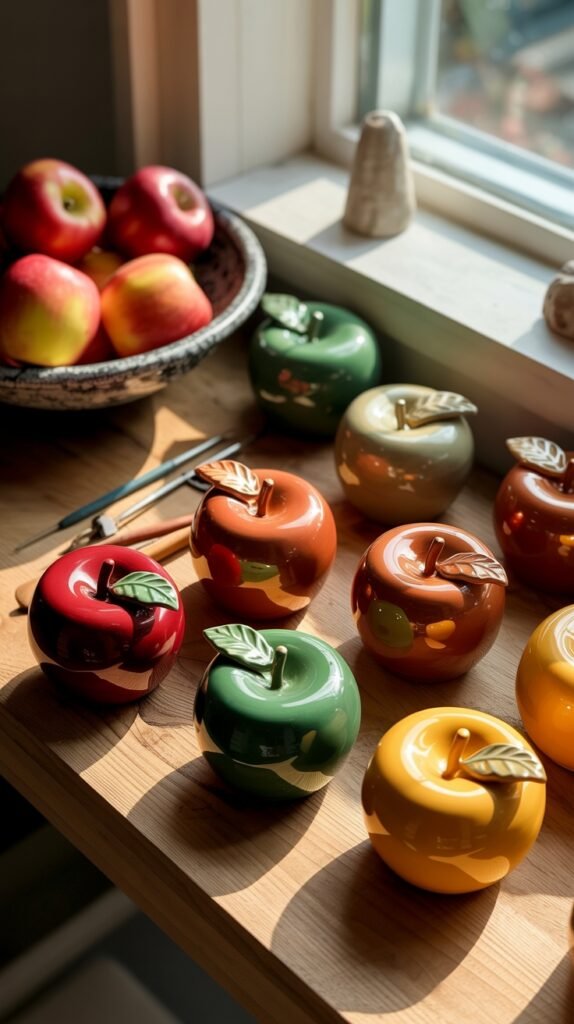
Roll a tiny log for the stem and flatten a teardrop shape for the leaf. Score both pieces and the pot with a toothpick and add a dab of water before you press them on, so they actually stay.
Then paint them red, green and golden yellow. A gloss coat makes them look almost real, and a quick stroke of a lighter color on one side looks like the sun hitting the apple.
They make sweet little teacher gifts in the fall, too. Pop a few wrapped candies inside and you’re done.
Fair warning, painted air-dry clay is not food safe. Keep the real snacks in a real bowl.
Magical Clay Projects Kids Will Love
5. Dinosaur Fossil Impressions
Got a kid who’s obsessed with dinosaurs? This is the project that’ll keep them busy and happy for a good hour, and it’s honestly fun for grown-ups too.
Roll out a thick round of clay, then press a plastic toy dinosaur firmly into it. Lift it straight up and you’ve got your own little fossil, footprints and all.
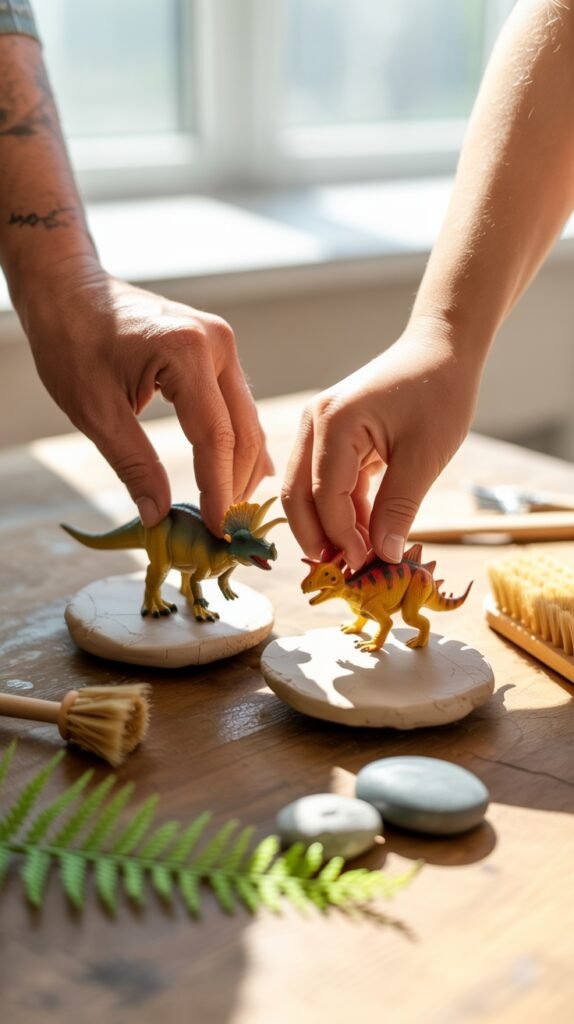
You can also press in shells, fern leaves or pebbles around the edges for that dig-site look. Leave them plain and bone colored, or rub a little brown paint into the dents and wipe the top so the shapes pop.
One small tip. Dust the toy with a bit of cornstarch first, because it stops the clay from grabbing the toy and pulling your nice print apart.
Once they’re dry, hide them in the sandbox for a fossil hunt. Hand out old paintbrushes for dusting off the sand and kids go wild for it.
It’s also a sneaky little science lesson. You can talk about how real fossils formed while they work, and they’ll actually listen because their hands are busy.
6. Unicorn Magnets for the Fridge
If your fridge is covered in boring takeout magnets, swap a few for these. Little unicorn heads with pastel manes and tiny gold horns are just pure fun.
You can freehand the head shape or use a small cookie cutter to keep them all the same. Add the mane as thin rolled ropes of clay in a few colors, and roll a skinny cone for the horn.
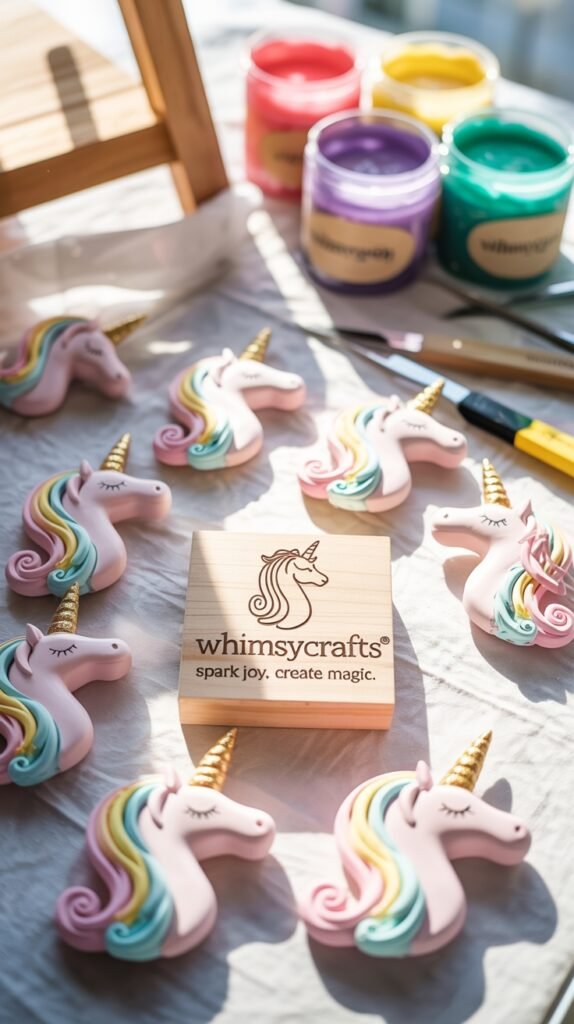
Once they’re dry, paint closed sleepy eyes with a fine brush and a soft pink cheek. A bit of gold paint on the horn really makes them shine.
Keep them fairly flat on the back. A unicorn that’s too thick and heavy will slide right down the fridge, no matter how strong the magnet is.
Glue a small strong magnet on the back with a good craft glue, not school glue. And if you have toddlers around, put these up high, because tiny magnets are a real danger if they get swallowed.
7. Mermaid Egg Creations
Believe it or not, these are just egg shapes with a scale pattern pressed in. But painted in shimmery purple, teal and pearl, they look like something washed up from a magic sea.
Roll the clay into eggs of different sizes. Then press the scale pattern by pushing the end of a drinking straw cut at an angle all over the surface, row by row.
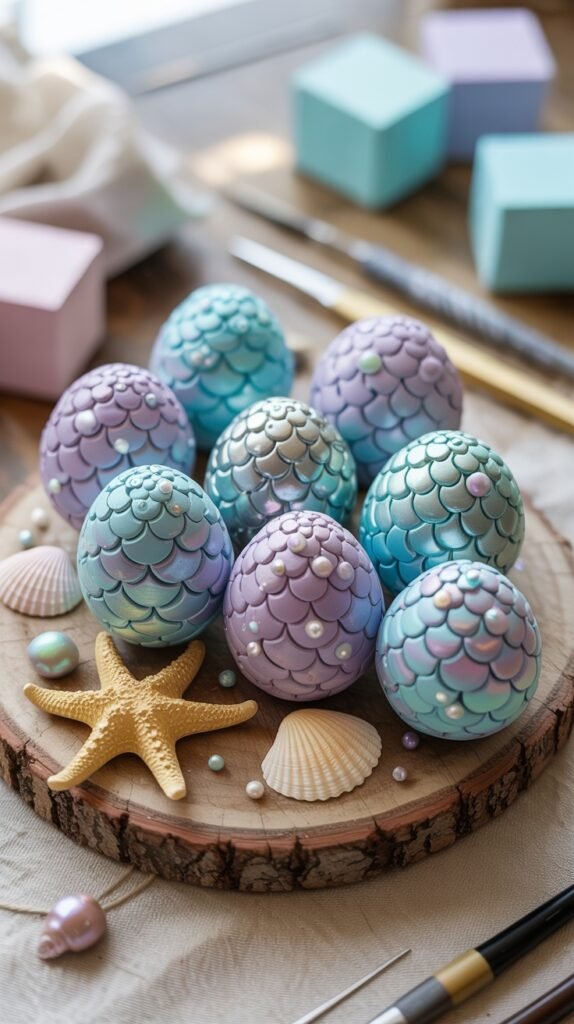
Paint them with pearly or metallic paint, and dry-brush a lighter color over the scales so the texture stands out. A little glitter in a final clear coat never hurts.
Pile them on a wood slice with a few real shells and a starfish. It makes such a sweet shelf display or party table piece.
Kids love hiding them, too. Tuck one under a pillow and tell them a mermaid left it, and you’ll be the favorite person in the house for a week.
One thing to watch is size. Small eggs dry fast, but big chunky ones can crack inside, so keep them under a palm size or build them over a ball of foil.
8. DIY Fairy Houses
This one feels the most magical to me. A tiny cottage with a round door, mossy roof and little flowers climbing the walls, small enough to sit on a shelf.
Build it around something, like a small jar, a toilet paper roll or a ball of foil. That keeps it light and stops the walls from slumping while you work.
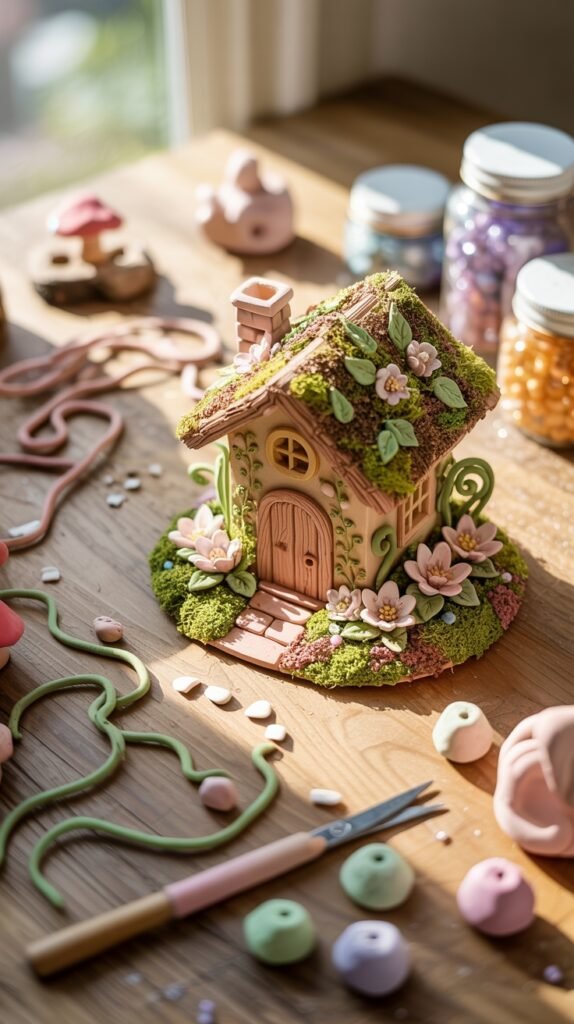
Add a round door, windows, a little chimney and some roof tiles with a toothpick. Then press on tiny clay flowers and glue on real dry moss after painting.
If you build it around a glass jar, you can drop a battery tea light inside. The windows glow at night and it looks like somebody tiny is really home.
If you want it outside in the garden, paint it and seal it with an outdoor sealer, and still bring it in when it rains. Air-dry clay just doesn’t love the weather.
Clay Keepsakes and Gifts
9. Handprint Keepsake Bowls
These are the ones that make grandparents tear up. A tiny hand, pressed into clay and shaped into a little dish, is basically a time capsule you can keep keys in.
Roll out a slab and have your little one press their hand down flat with fingers spread. Then cut around the outline, leaving a thin border so the fingers don’t snap off.
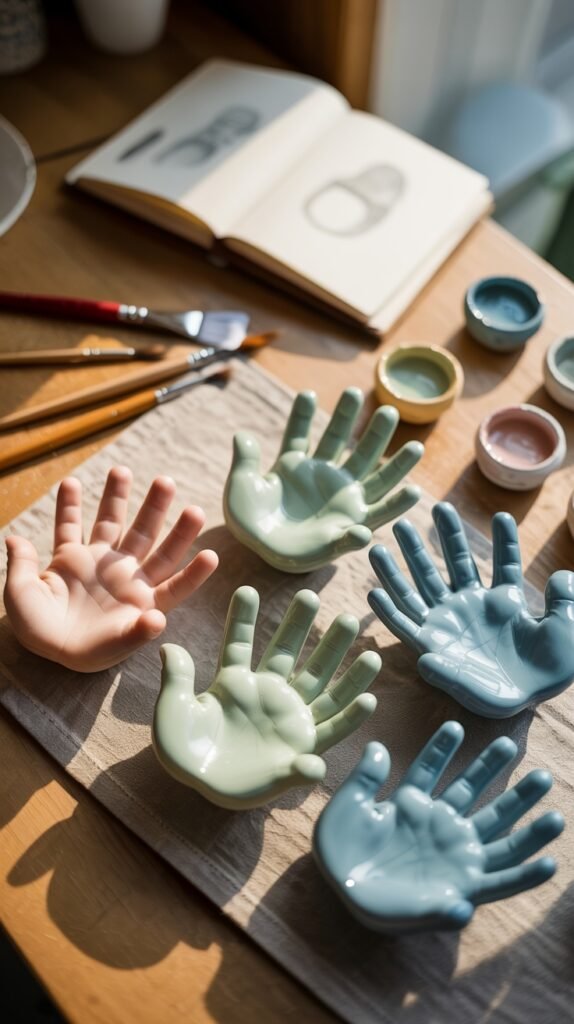
Lift the edges a little and let it dry over a small bowl so it curves. Paint it soft blue or sage green, and maybe scratch the name and year on the back.
Make one every year and line them up on a shelf. Watching those little hands get bigger is honestly the best part.
You might need a few tries. Kids wiggle, and that’s okay, just squish it and roll again. Wipe their hands right after because dried clay on little fingers gets itchy.
10. Personalized Name Keychains
Make one of these for every kid in the house and suddenly nobody fights over whose keys or backpack is whose. Big puffy letters in bright colors are hard to lose.
Polymer clay works best here because it bakes hard and holds up to being swung around all day. Use letter cutters, or roll thin ropes and shape the letters by hand.
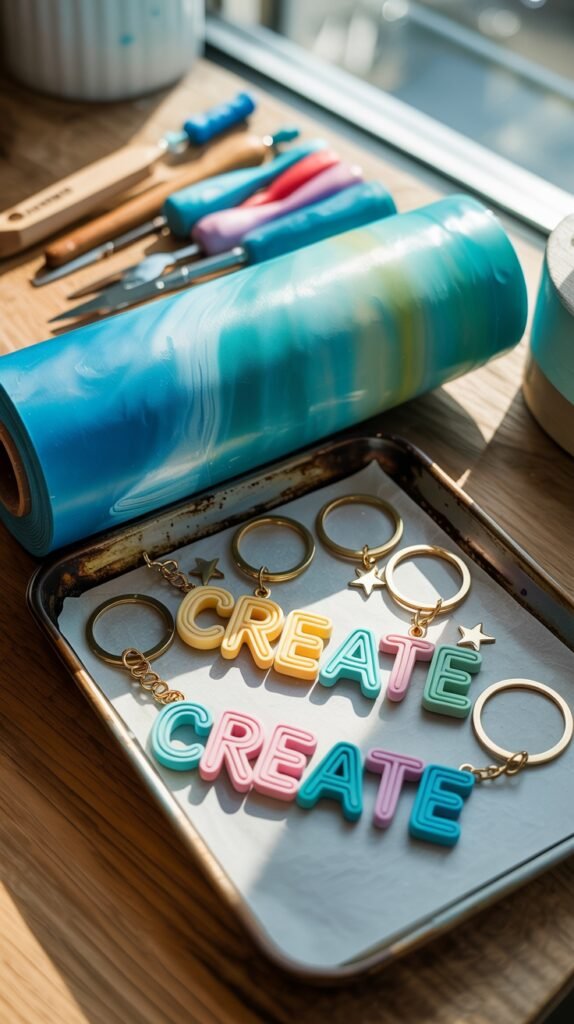
Push a small eye pin into the top letter before baking, so you have something to hook the keyring through later. Then bake on a tray following the temperature on your clay package.
Joined-up names are stronger than single loose letters. Press the letters so they touch each other a little, and the whole word bakes into one solid piece.
Don’t guess the oven temperature, okay? Too hot and polymer clay burns and gives off nasty fumes. Too cool and it stays fragile and snaps.
11. Pressed Flower Clay Tags
These tags look so fancy, like something from a little garden shop. And they’re just flowers pressed into clay.
Roll your clay thin and smooth, then cut tag shapes with a small knife. Lay a flat flower or a leaf on top and roll over it once with a rolling pin to press it in.
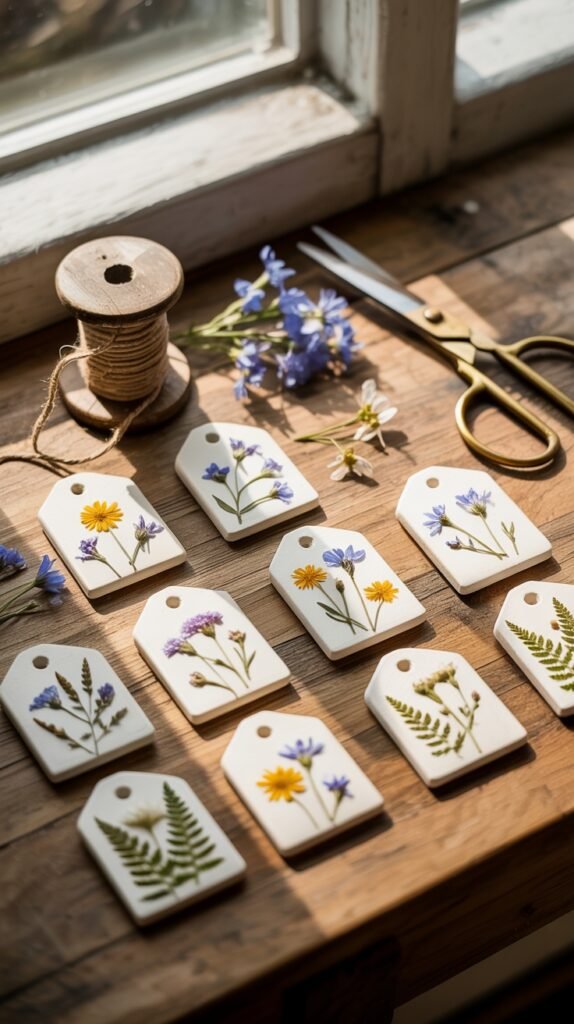
You can peel the flower off for just the print, or leave it on and seal it in. Poke a hole at the top for twine before it dries, because drilling dry clay usually cracks it.
Tie one on a gift, hang a few on the tree, or use them as bookmarks. Little wildflowers, ferns and herbs from the garden work really nicely.
Flat, thin flowers are your friend here. Skip anything thick and juicy like a rose head, because it just squishes into a blob.
12. Fingerprint Family Trees
This is such a lovely one for family gatherings. Everyone presses their fingerprint into the clay as a leaf, and you end up with a little tree that holds the whole family.
Shape a simple trunk with a few branches, either as a flat plaque or a little standing tree like the ones in the photo. Then have each person press one finger onto the ends of the branches.
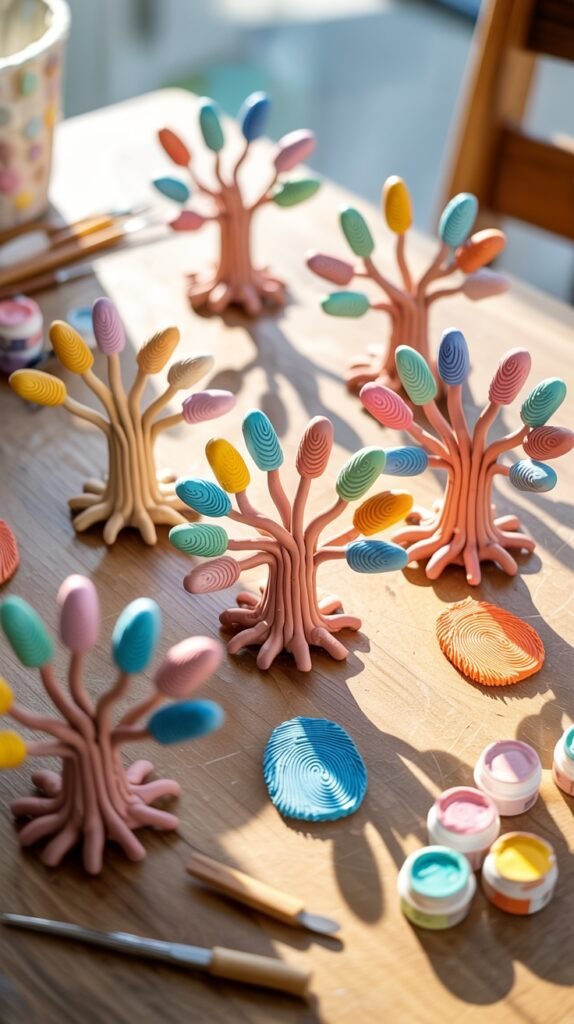
Paint each leaf a different color once it’s dry, so everybody has their own. You could scratch initials next to each one too.
A standing tree needs a solid base. Make the bottom wide and flat, like a little stump, so it doesn’t tip over on the shelf.
Do the fingerprints while the clay is still soft but not sticky. If it’s too wet, the prints smudge, so let it rest for ten minutes after shaping.
Clay Decor for Walls and Windows
13. Boho Rainbow Decorations
These soft, earthy rainbows are everywhere for a reason. They make a nursery or bedroom feel warm without being loud.
Roll long even ropes of clay, then curve them into arches and stack them inside each other. Smaller arches go inside, bigger ones outside, and press them together gently.
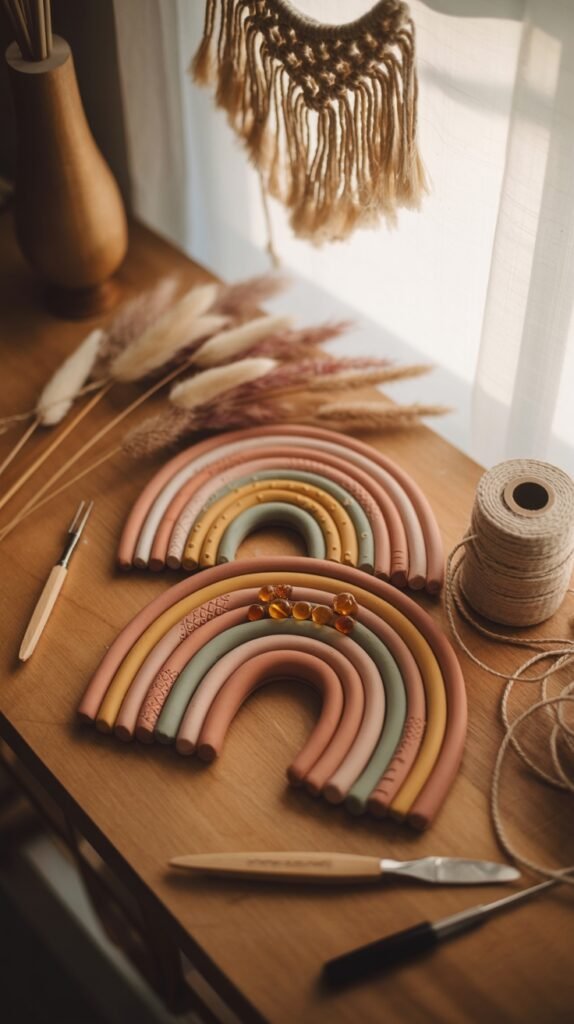
Paint each band in rust, mustard, blush, sage and cream. Then add tiny dots or stripes if you want some pattern.
Make a few in different sizes and you’ve got a whole set. A big one over the crib, two small ones on a shelf, and the room suddenly feels pulled together.
To get the ropes even, roll them under a flat piece of cardboard instead of your hands. It sounds silly, but it works so much better.
I’d suggest drying these flat on parchment paper and turning them over halfway, since the ends love to curl up. Hang them with twine or a bit of macrame for that cozy boho feel.
14. Delicate Snowflake Ornaments
Making snowflakes out of clay is a sweet way to get a head start on holiday decorating. White, simple, and they look lovely hanging on the tree or in a window.
Roll your clay thin and cut stars or snowflakes with cookie cutters. Then press patterns in with a toothpick, a fork or a lace doily rolled right over the top.
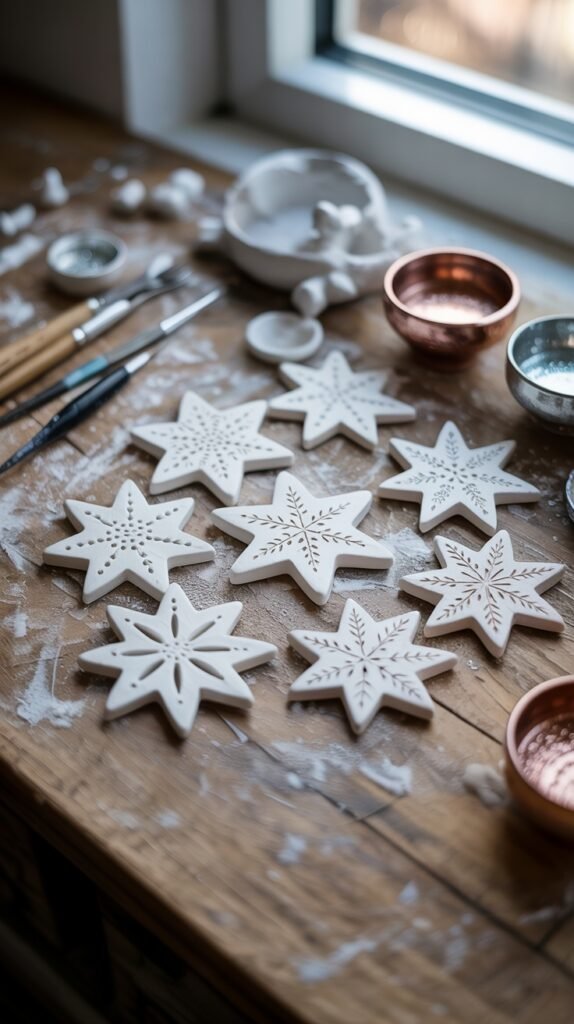
Brush on a little glue and shake fine glitter over them once they’re dry. Or keep them plain white and just rub a bit of silver paint over the raised parts.
They also make great gift toppers. Write a name on the back in pencil and tie one onto each present instead of a sticky label.
Make the hanging hole before drying, nice and big. The thin points break easily, so pack them away wrapped in tissue paper after the holidays.
15. Hanging Clay Mobiles
This last one is so calming to look at. A driftwood stick with leaves, moons and little rainbows dangling from strings, slowly turning in the breeze.
Cut your shapes from thin clay, like leaves, crescent moons and small arches. Poke a hole near the top of each one and let them all dry flat.
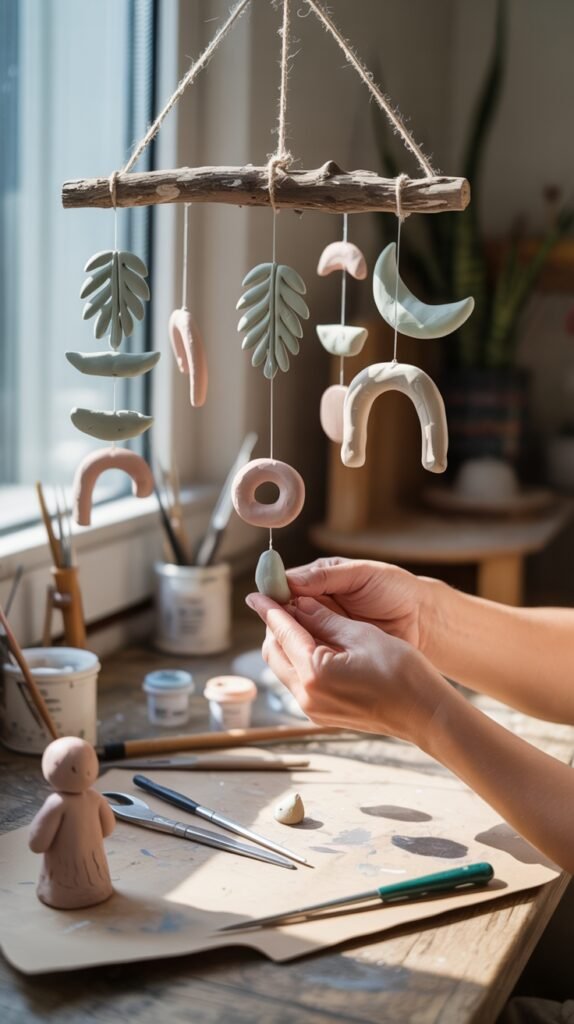
Paint them soft greens and creams, then tie each one to the stick with fishing line or thin string at different lengths. Hang it from the middle first and move pieces around until it balances.
Odd numbers usually look nicer than even ones. Five or seven pieces feels natural, while four can look a bit stiff.
No driftwood around? A thin branch from the yard works just as well. Wash it, let it dry for a day, and it’s ready to go.
Keep it away from cribs and little hands. Hang it over a window or in a reading corner instead, where it can spin safely.
That’s pretty much the list
Fifteen clay ideas, and you really don’t need to make them all. Seriously, just pick one.
If you want something quick and useful, start with the trinket dishes. If the kids are bored, go for dinosaur fossils. And if you need a gift that makes someone cry happy tears, it’s the handprint bowl every time.
Don’t stress if your first piece comes out lumpy. Mine always do, and the second one is always better.
Grab a bit of clay, clear a corner of the table, and see what your hands come up with. So which one are you trying first this weekend?