
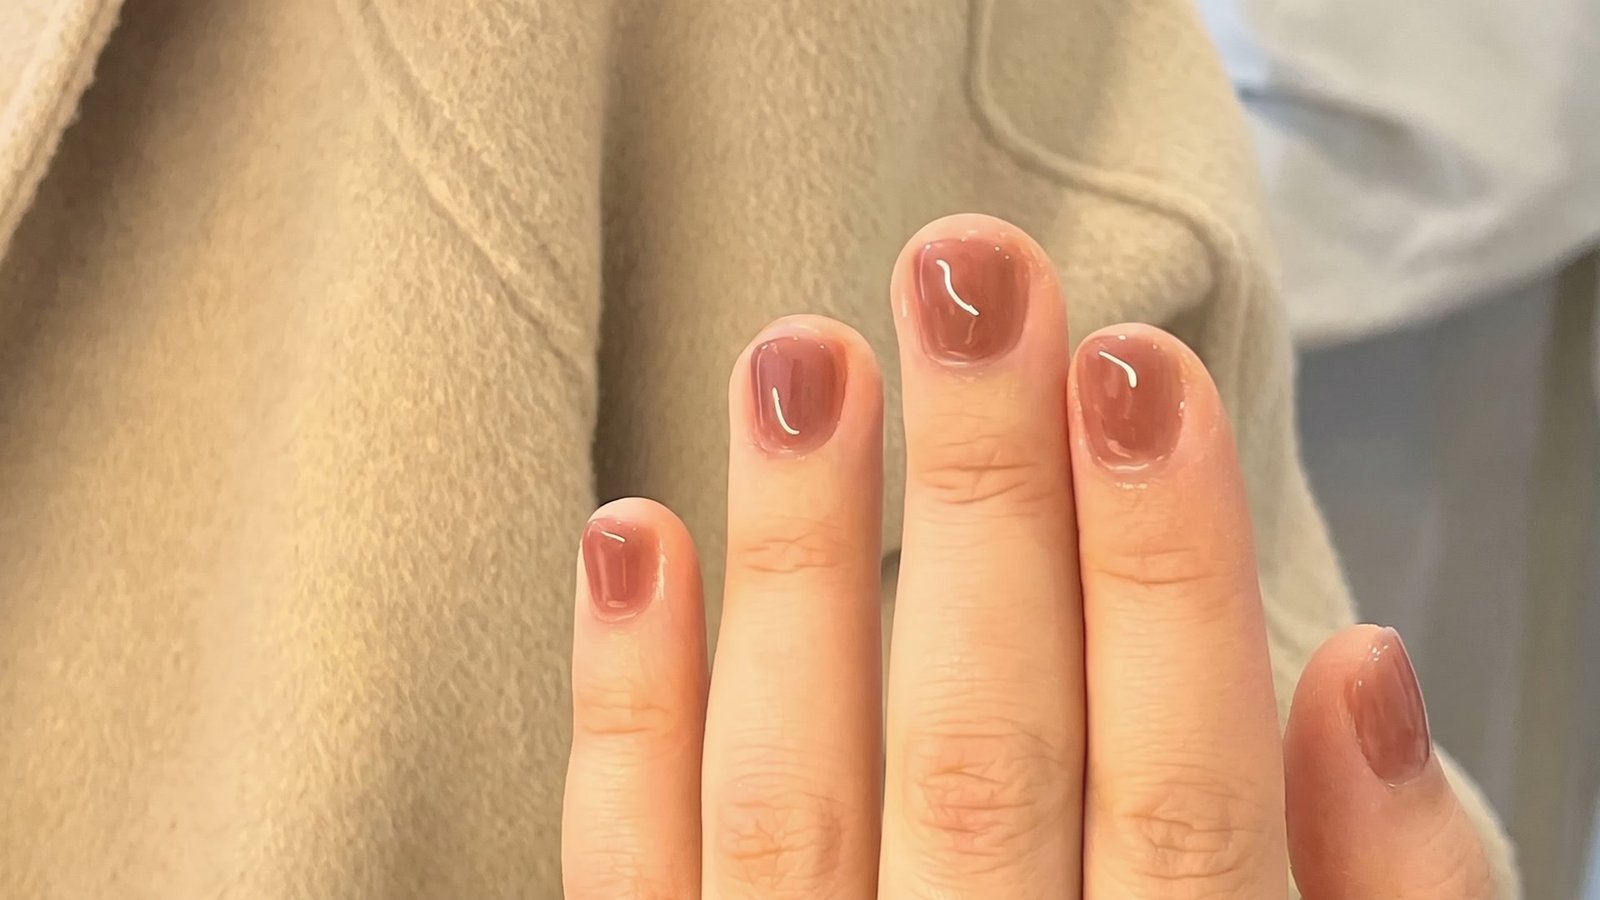
You know those nails you keep seeing on your feed? Short, glossy, almost see-through, like they’re made of glass or jelly candy. That’s the Korean nail look, and it’s everywhere right now.
And honestly, it makes sense. These nails look neat and expensive, but they’re not loud. You can wear them to the office, to brunch, to a wedding, and they always fit.
I get why long, dramatic nails feel like too much for a lot of people. They snag on everything, they make typing hard, and they need constant fixing.
Korean-style nails go the other way. They’re usually short, rounded and soft, with a shiny finish and maybe one tiny detail, like a little star or a bunny.
I’ve picked nine designs for you, from plain glossy jelly colors to cute tiny nail art and one bold color-shifting look. Each one comes with what it looks like, when to wear it and one thing to watch out for.
The photos come from real nail artists on Instagram, so you can tap the credit under each one to see more of their work. Screenshot your favorite and show it to your nail tech, it makes the whole appointment so much easier.
What Makes a Nail Look Korean?
Before we get into the designs, let’s talk about what actually makes this style different. Because it’s not just the color.
First, the shine. Korean manicures usually have a very glossy, almost wet-looking finish. It’s done with a thick, shiny top coat that catches the light.
Second, the jelly effect. Instead of solid color, a lot of these nails use sheer, see-through polish. You can kind of see the nail underneath, like looking through colored glass.
Third, the shape. Nails are usually short and rounded, or a soft square with rounded corners. Nothing pointy, nothing super long.
And last, the details are tiny. A single star, a small drawing, a few dots. The goal is “neat with a little surprise”, not a full painting on every finger.
Glossy Jelly and Solid Shades
1. Blush Jelly Shimmer
A sheer, rosy-brown jelly color on short, rounded nails. It’s like a tinted lip gloss for your hands.
The photo shows how glossy it gets. You can see the light bouncing off each nail, and the color still lets a little of the natural nail show through.
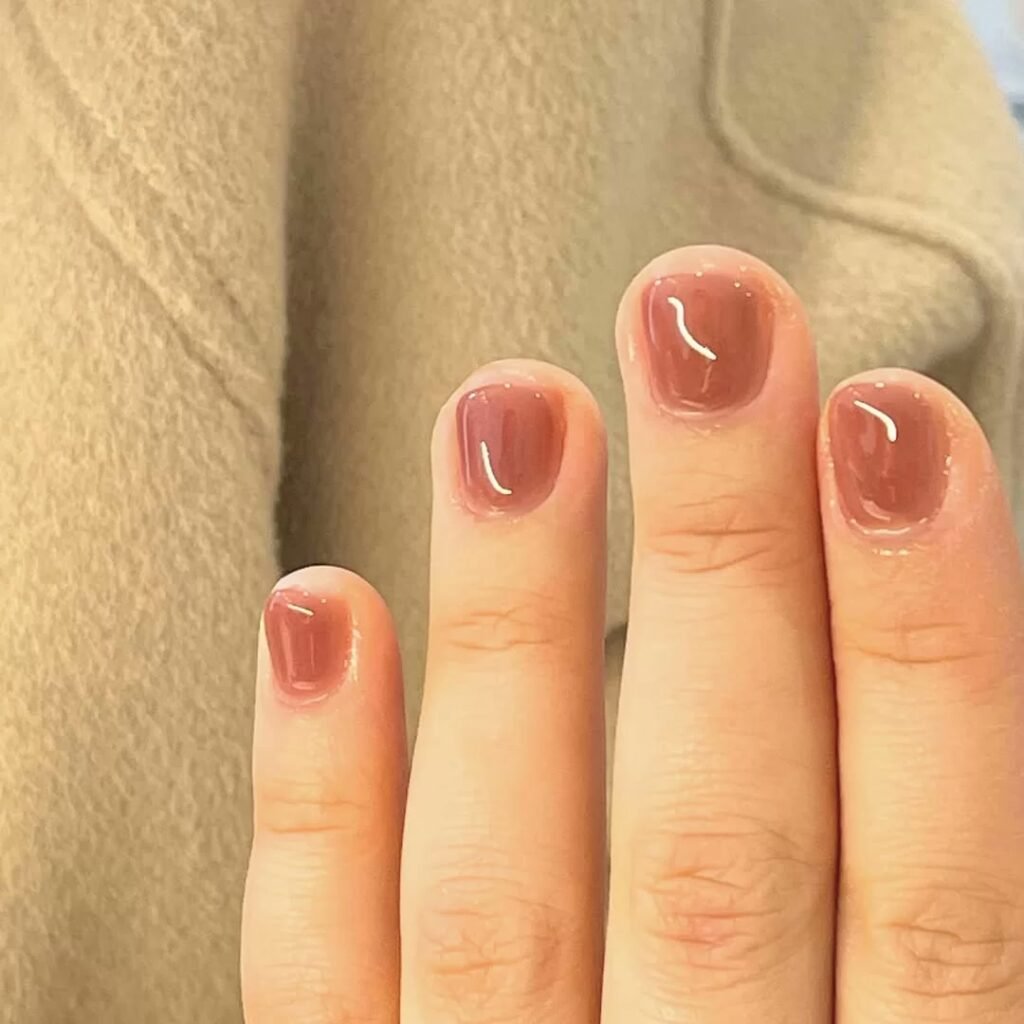
This is the one I’d pick if you’ve never tried Korean nails before. It looks polished, but it’s so close to your natural color that it never feels like too much.
It works with everything, honestly. A beige coat, a black dress, a gym hoodie. It’s that kind of easy, everyday color.
The trick is to build the color slowly. Two or three thin coats give you that see-through jelly look, while one thick coat just looks streaky.
One caution. Sheer colors show everything underneath, so if your nails have ridges or stains, ask for a smoothing base coat first. Otherwise the jelly can look patchy.
It also grows out really gracefully. Because the color is so close to your skin, the little gap at the bottom barely shows, even after two weeks.
2. Pearl Chrome Elegance
Milky, silvery-white nails with a soft pearl shine, on short rounded tips. In the light they almost look like the inside of a seashell.
This is the dressy one. It looks expensive in a quiet way, like you just got your nails done for a wedding.
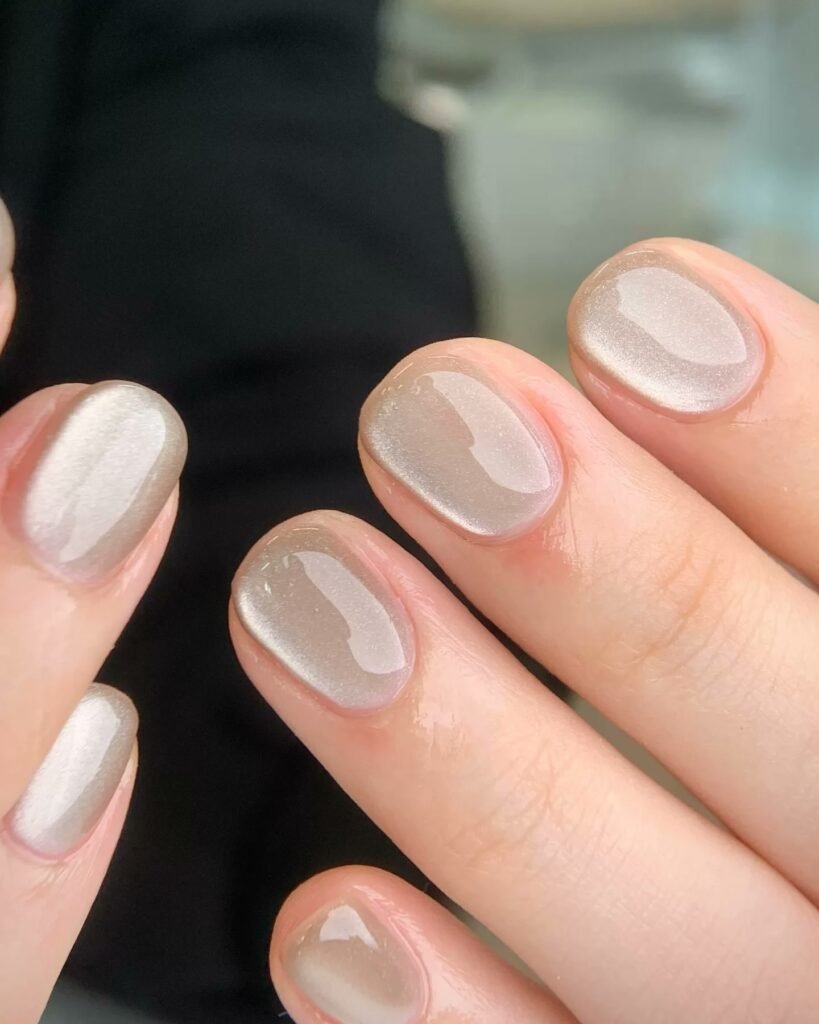
The pearl effect usually comes from a fine chrome powder rubbed over a sheer white or nude base. Your nail tech buffs it on with a small sponge or silicone tool, then seals it with top coat.
It’s perfect for weddings, parties and anything formal. But I think it works for everyday too, because the color is so soft.
If you’re doing this at home, go slowly with the powder. A tiny bit goes a long way, and too much makes it look metallic instead of pearly.
And watch out for harsh cleaning sprays. Strong chemicals can dull the pearl shine, so wear gloves when you clean the bathroom or kitchen.
If you’re a bride or a bridesmaid, show this one to your nail tech. It looks beautiful in photos next to a white dress and silver or pearl jewelry.
3. Tomato Red Jelly
A deep, juicy red with a super high-gloss jelly finish. The color is rich, a bit cherry, and the shine makes it look almost wet.
I know red isn’t technically “neutral”. But a glossy jelly red is a classic in Korean salons, and it goes with pretty much any outfit.
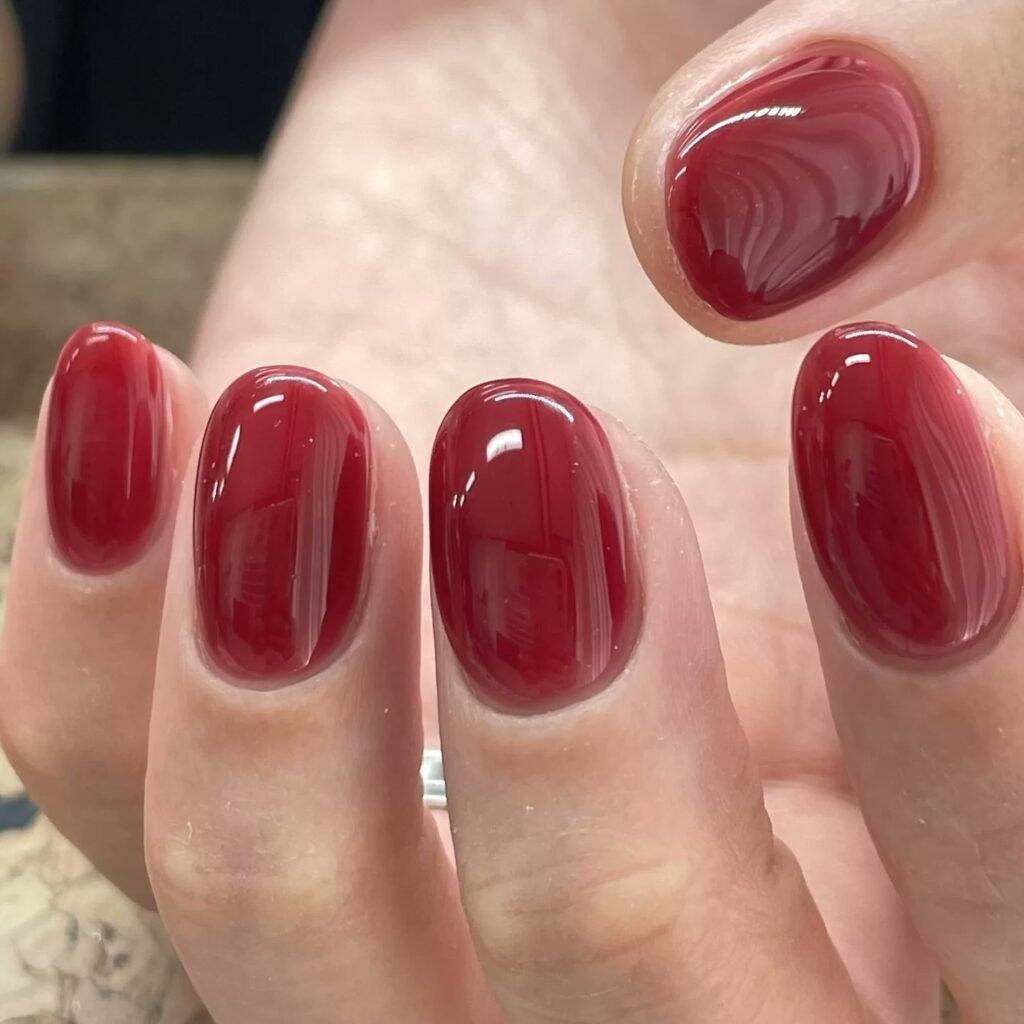
The jelly finish is what keeps it soft. Unlike a flat, solid red, you can see a little depth in the color, which makes it look less harsh.
This one is great for winter, holiday parties and date nights. Pair it with gold jewelry and you’re done.
Short nails are key here. Red on long nails can look dramatic, but on short, rounded nails it looks clean and classic.
Here’s a small tip. A fresh layer of top coat a couple of days after your manicure keeps the shine going longer, especially with dark reds that show scratches quickly.
Want it a bit softer? Ask for one less coat. You get a lighter, more see-through red that looks more like a stain than paint.
4. Classic Burgundy Jelly
Deep wine-red jelly nails, short and softly squared, with a glassy shine. It’s a little darker and moodier than the tomato red.
In the photo, the nails almost look like red glass. That see-through depth is what makes it a jelly look and not just regular red polish.
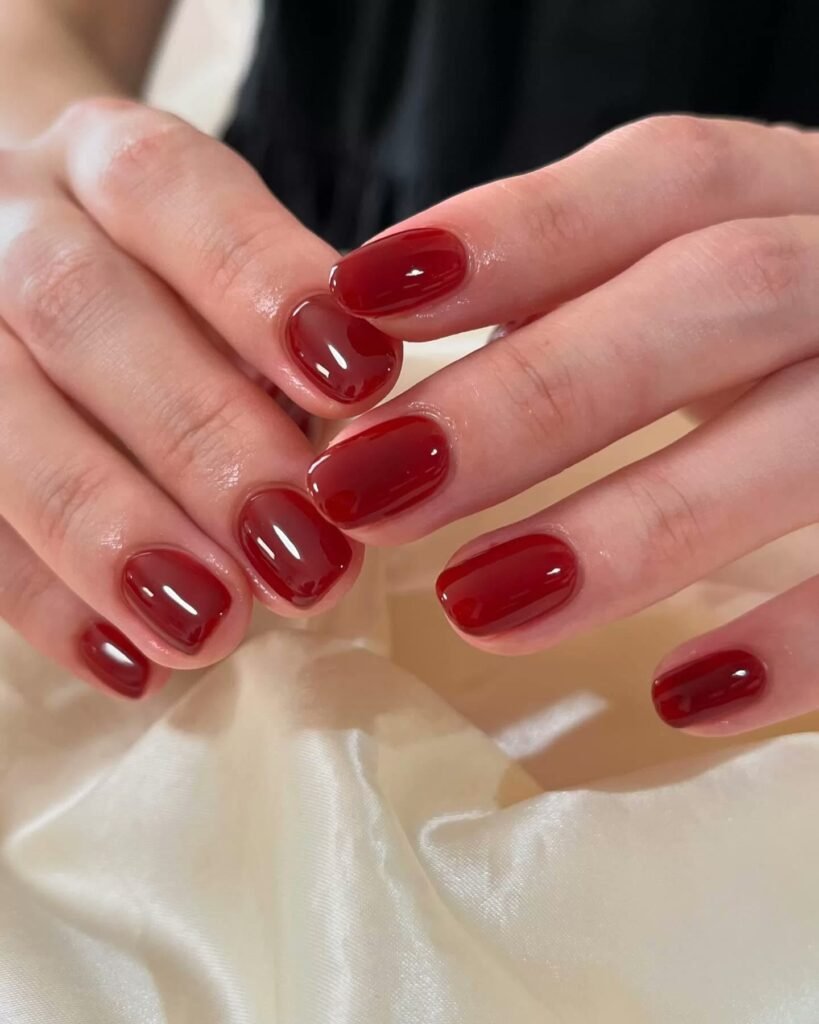
This is a great office color. It’s dark enough to look serious but shiny enough to feel fun.
Fall and winter are its best seasons, but honestly, you can wear it year-round. It looks really nice with cream, black and camel clothes.
Build it in thin layers. Each layer makes the color deeper, so stop when it looks right to you. Two coats is lighter, three or four is darker.
The only downside? Dark shades show chips fast. Wear gloves for dishes, and keep a tiny bottle of top coat in your bag for quick touch-ups.
If you can’t choose between this and the tomato red, here’s a simple rule. Tomato red for daytime and parties, burgundy for evenings and cold weather.
5. Classic Mocha Shine
A rich chocolate-brown jelly color on short, neat nails. It’s warm, glossy and looks a lot like a cup of coffee in the light.
Brown nails are having a moment, and this is the softest way to try them. It’s not black, not too dark, just cozy.
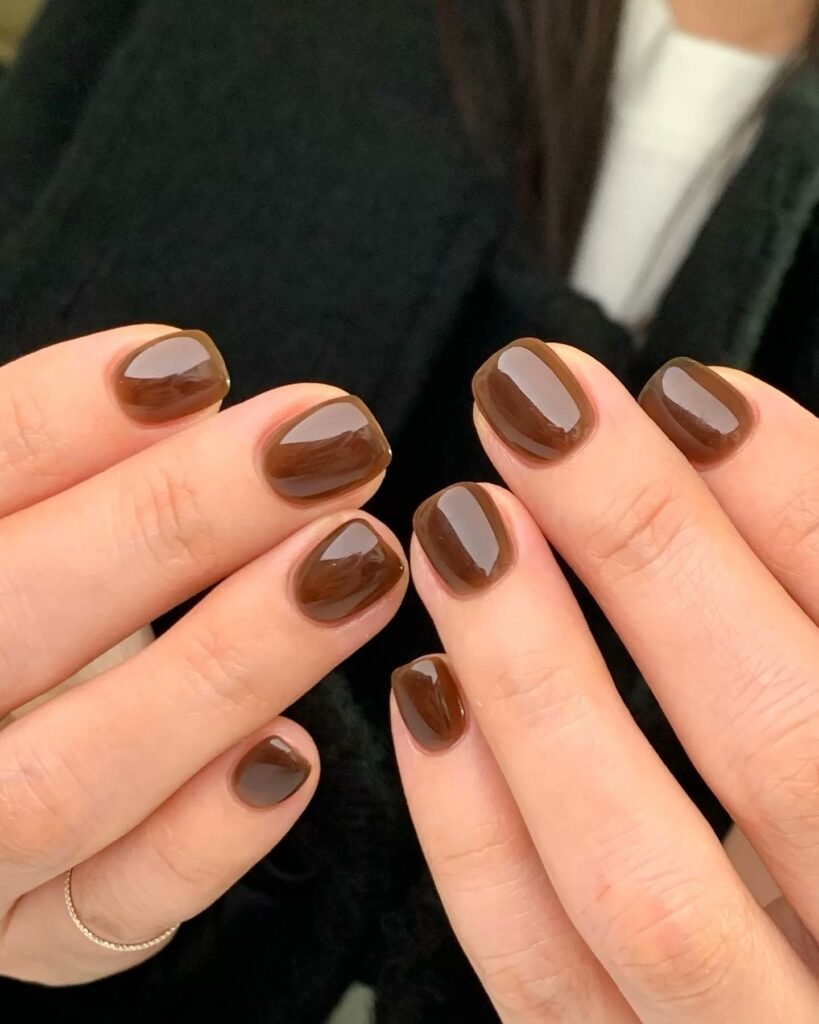
In the photo, a thin gold ring makes it look even more put-together. Brown and gold are a really nice match.
This one is perfect for the office and for fall. It goes with sweaters, trench coats and anything in beige or camel.
Apply it in thin layers for an even finish. Thick coats of brown polish can look bumpy and take forever to dry.
And keep up with cuticle oil. Dark colors make dry, rough cuticles stand out, so a quick drop of oil every night keeps everything looking neat.
For a lighter take, ask for a milk-tea brown instead. It’s the same idea, just more beige, and it’s a little more forgiving if you’re not sure about dark nails yet.
Cute Minimal Nail Art
6. Sweet Bunny Art
Sheer pink nails with two tiny accent designs. One nail has a little bunny face, and another has tiny pink bows drawn on a white base.
It’s playful but still neat. Most of the nails stay plain, so the cute bits really stand out.
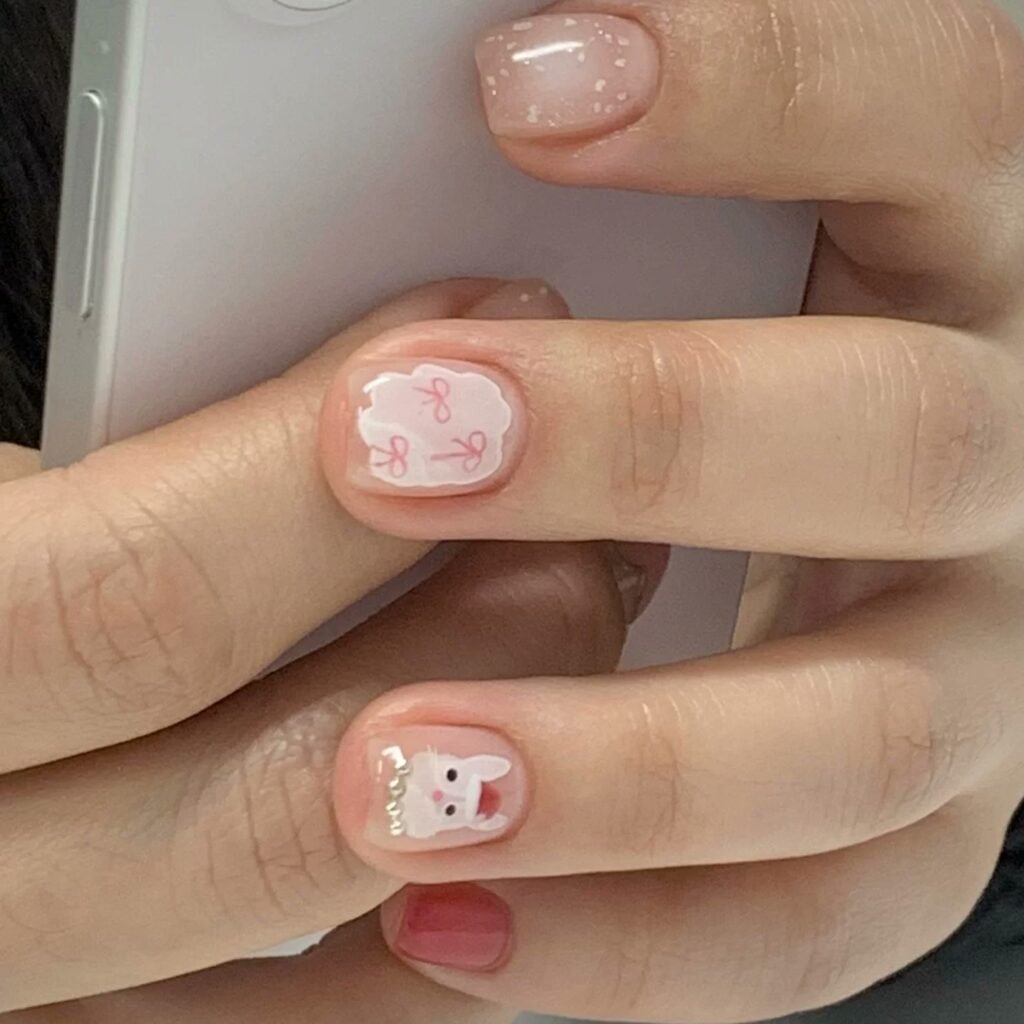
This one is perfect for spring or any time you want something a bit fun. It also makes a really sweet birthday manicure.
The bunny and bows are hand-painted, so this is an “ask your nail tech” design. If you want to try it at home, a dotting tool makes the round little details much easier.
You can always keep it even simpler. Just one bunny on your ring finger, and the rest plain pink.
Be gentle with the art nails. Raised details can catch on hair and sweaters, so avoid picking at them, and add a thick top coat to smooth everything out.
And you can swap the bunny for any little character you love. A cat, a bear, a tiny strawberry. The plain pink base makes anything cute.
7. Minimalist Letter Art
Sheer, nude-pink nails with tiny black letters, one on each nail. Two accent nails get little doodles, like a cute puppy face and a tiny heart drawing.
It’s like wearing a secret message. You can spell out a name, an initial or a word that means something to you.
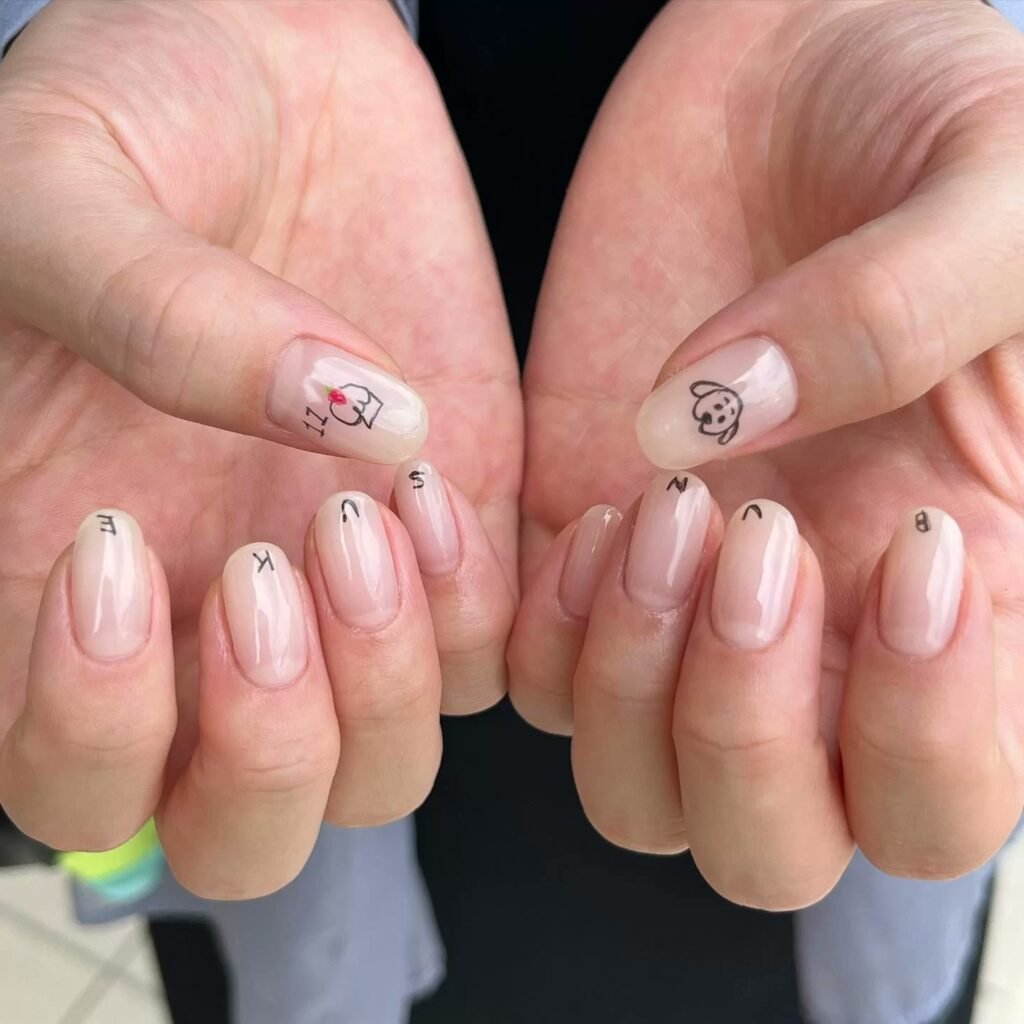
Letters are really hard to paint freehand, especially on short nails. That’s why nail stickers or water decals are a lifesaver here.
This look works for pretty much any day. It’s subtle from far away, and fun when someone notices it up close.
If you use stickers, press them down well and seal them with an extra layer of top coat. Otherwise the edges can lift after a few days.
And think about which way the letters face. Do you want them to read right for you, or for someone looking at your hands? Decide before you start.
Couples sometimes split a word across both people’s hands. It’s a sweet idea for an anniversary or a wedding photo.
8. Starlight Sparkle
A mix of sheer pink and peachy nails with tiny silver four-point stars, a little white bow drawn on one nail and small sparkles here and there. Very soft, very dreamy.
In the photo, the hands are wrapped around a speckled mug, and it just looks so cozy. That’s the vibe of this design.
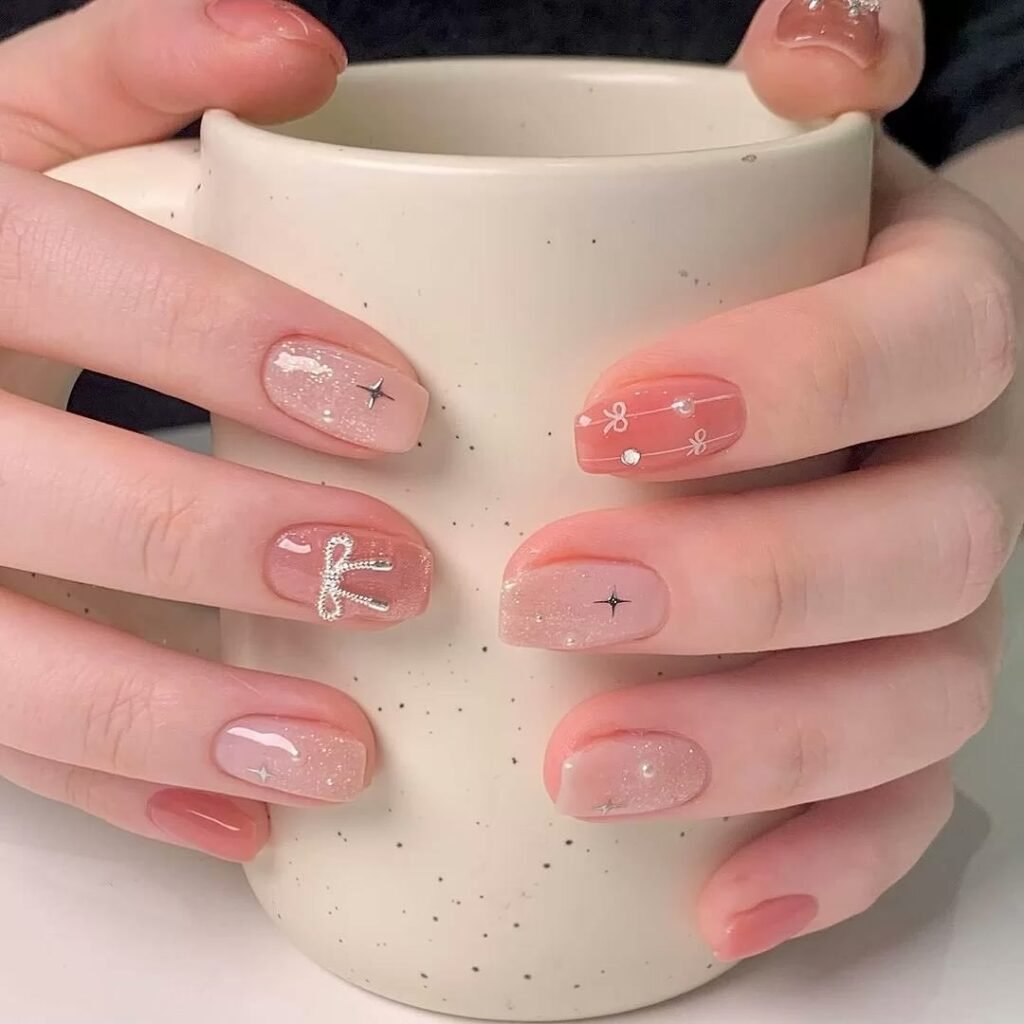
This is a lovely choice for celebrations, like a birthday, an anniversary or the holidays. It’s special but not over the top.
The little stars and gems need some skill. If you’re adding tiny crystals, press them into the gel or top coat before it’s cured, so they stay put.
Not a fan of sparkle? Skip the gems and just keep the drawn stars and bow. It still looks pretty and is much easier to keep tidy.
Just be careful when you wash your hands. Gems can pop off if you scrub hard or catch them on a towel, so treat them gently for the first few days.
It’s also a great holiday manicure. Silver stars look festive in December without going full red and green.
One Bold Statement
9. Aurora Borealis Gradient
Dark nails that shift from deep green to purple and teal when they move, with a glowing line of light across each one. One accent nail is creamy white with a tiny black heart.
It’s the most dramatic design here. Like the northern lights, but on your fingers.
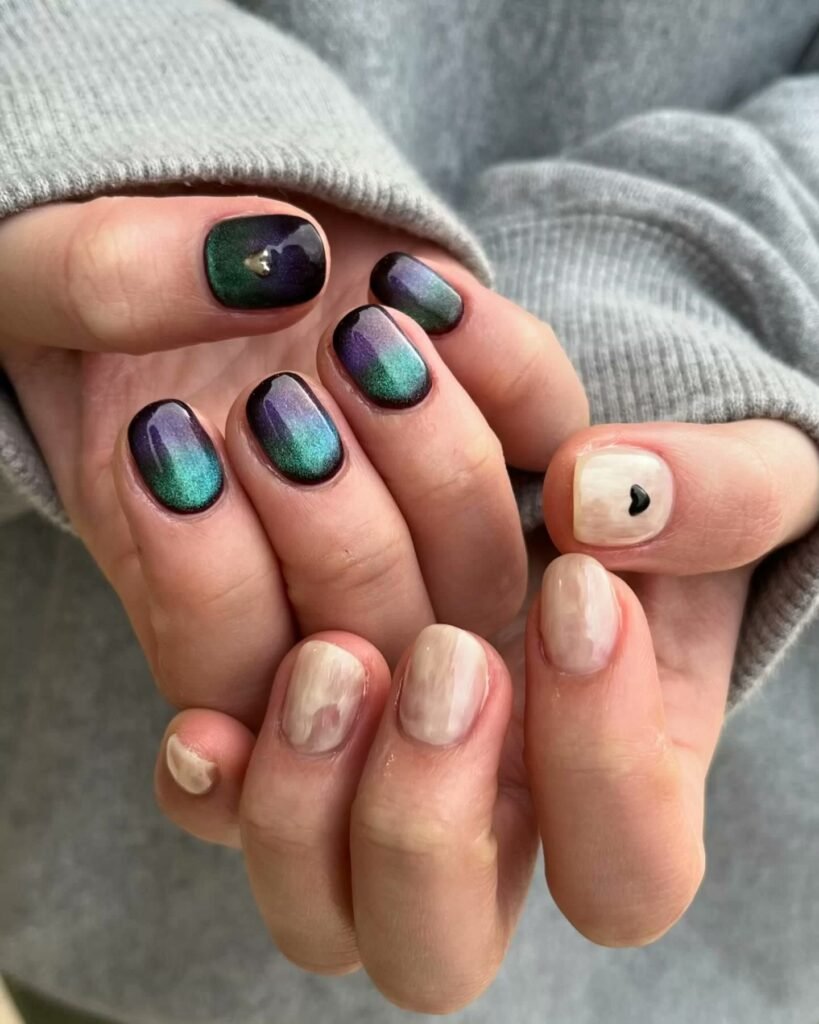
This effect is called cat eye. It’s made with a magnetic gel polish full of tiny shiny particles, and the nail tech holds a small magnet over each nail to pull the shine into a line.
It’s perfect for nights out and special events. And because the nails are still short and rounded, it looks cool instead of costume-y.
The cream accent nail with the heart is a nice touch. It breaks up all that dark color and gives your eye a little place to rest.
Fair warning, this one takes more time and the right tools. A magnet, a lamp and a steady hand. If you’re new to nails, I’d leave this one to the salon.
Want it a little calmer? Do the cat eye on just two nails and keep the rest a sheer nude. You still get the glow, just in smaller doses.
Match Your Nails to the Season
Not sure which one to book next? Let the season decide for you.
In spring, go soft and cute. The sweet bunny art or the blush jelly feel fresh and light, like the first warm days.
Summer is great for the starlight sparkle or the pearl chrome. They catch the sunlight and look really pretty with a tan.
In fall, the mocha shine and the burgundy jelly just feel right. They match sweaters, boots and pumpkin spice everything.
And winter is the time for tomato red and the aurora cat eye. Holiday parties, New Year’s Eve, cozy nights out, they’re made for it.
Pick Based on Your Lifestyle
Your job and your hobbies matter more than you think. A design that’s perfect for one person can chip in two days for another.
If you type, cook or clean a lot, stick to the plain jelly colors. No gems, no raised art, nothing to catch or chip.
If you work in a formal office, the mocha, burgundy or pearl chrome look polished without drawing too much attention.
And if you’ve got a big event coming up, like a wedding or a birthday, that’s the perfect excuse to try the art designs or the cat eye.
Gel or Regular Polish?
Most Korean salons use gel, and that’s a big part of the look. Gel is cured under a small UV or LED lamp, so it dries hard and super shiny right away.
The upside is that gel lasts a lot longer, usually a couple of weeks without chipping. The downside is that you need a lamp to apply it and acetone to take it off.
Regular polish is cheaper and easier to remove. But it chips sooner and takes a while to dry, so you have to sit still and be patient.
The good news? You can get the jelly look with both. Look for polish labeled sheer or jelly, and finish with a thick glossy top coat.
My suggestion is simple. If you want it to last through a busy few weeks, go gel at a salon. If you like changing your color every few days, regular polish at home is totally fine.
Getting the Short, Rounded Shape
The shape matters almost as much as the color. Short, soft nails are what make these designs look Korean instead of just pretty.
Keep the length short, just a tiny bit past your fingertip. Shorter nails are stronger, easier to type with and they make jelly colors look neat.
File in one direction instead of sawing back and forth. A glass nail file is gentle and leaves a smooth edge.
Round off the corners a little. A soft square with rounded edges, or a full round shape, both work well.
And push back your cuticles gently after a shower, when the skin is soft. Never cut too deep, because sore, red cuticles ruin even the nicest manicure.
What to Tell Your Nail Tech
Show a photo. It’s the easiest way to explain a style, and it saves a lot of back and forth. Screenshot the design you want from this list.
Say “short and rounded” and “jelly” or “glass finish”. Those words tell most nail techs exactly what you’re after.
If you want art, mention which nails. One accent nail, two, or all of them. That changes how long the appointment takes.
And be honest about your daily life. If you type all day, wash dishes or work with your hands, ask for a strong base and shorter length so it lasts.
How to Make Your Manicure Last
So you’ve got your dream nails. Here’s how to keep them looking fresh for as long as possible.
Use cuticle oil every day. A tiny drop at night keeps your skin soft and makes the whole manicure look newer.
Wear gloves for dishes and cleaning. Hot water and cleaning sprays are the biggest reasons nails chip and lose their shine.
Add a fresh layer of top coat every week or so. It brings the gloss back and covers small scratches.
Don’t use your nails as tools. Opening cans, peeling stickers, scraping things, we all do it, but it’s the fastest way to chip your polish.
And please don’t peel off gel polish when it starts to lift. It pulls off layers of your real nail too. Soak it off properly or let your nail tech remove it.
Quick Answers to Common Questions
How long do Korean gel nails last? With good care, usually around two to three weeks before they start to grow out or chip.
Will these colors suit my skin tone? Most of them, yes. Sheer jelly colors are very forgiving, because you can make them lighter or darker with more or fewer coats.
How do I keep the glossy finish? Cuticle oil every day and a fresh top coat every five to seven days. That’s pretty much the whole secret.
Can I do these at home? The plain jelly colors, yes, with some practice. The art designs and the cat eye are much easier at a salon, at least the first time.
That’s pretty much the list
Nine Korean-style nail designs, from soft blush jelly to a full aurora cat eye. You don’t need to try them all.
If you’re new to this, start with the blush jelly or the mocha. Get used to the short, glossy look first, and then add a little bunny or star next time.
And if you’re already a nail lover, go for the pearl chrome or the aurora. They’re the ones people will ask you about.
Whatever you pick, take a quick photo on day one. It’s fun to look back at, and it helps you remember which colors you actually loved wearing.
Long story short, the best manicure is one that fits your real life and still makes you happy every time you look down at your hands.
So which one are you showing your nail tech first?