
Every October, the same thing happens. The kids want to “make something for Halloween,” you say yes, and then you spend twenty minutes scrolling for an idea that doesn’t need a trip to the craft store.
I get it. Some Halloween crafts online look adorable but need a hot glue gun, three special tools and an art degree. Others are so simple the kids are bored in five minutes.
So this list sits right in the middle. These are crafts that use stuff you probably already have, like paper plates, toilet rolls, old socks, yarn and a bit of paint.
Most of them work for little kids with some help, and plenty are fun for teens and grown-ups too. A few even turn into decorations you’ll actually want to keep out all month.
I’ve split them into four groups. Pumpkin crafts, spooky decor you can make together, ghosts and mummies, and paper and art projects.
You don’t need to do all twenty, obviously. Pick two or three for this weekend and save the rest for the next rainy afternoon.
Before You Start: The Halloween Craft Box
Here’s a little trick that saves so much time. Fill one box with the basics, and every craft on this list becomes a “let’s do it right now” kind of thing.
Put in orange, black, white and green paint, a few brushes, glue sticks, white school glue, safety scissors and a big bag of googly eyes. Add some yarn, felt scraps, paper plates and a stack of colored paper.
Save toilet rolls, paper cups, milk jugs, glass jars and odd socks for a couple of weeks too. Half of these crafts turn trash into decorations.
And keep an old tablecloth or a pile of newspaper with the box. Trust me, you’ll want it under every single project.
Pumpkin Crafts Without the Mess
1. Painted Pumpkins and Gourds
Carving pumpkins is fun until somebody gets a knife slip and there’s pumpkin goo all over the floor. Painting them is just as fun, way safer, and they last a lot longer too.
Wash your pumpkins and little gourds and dry them really well. Then grab acrylic paint and go wild with polka dots, stripes, splatters or speckles.
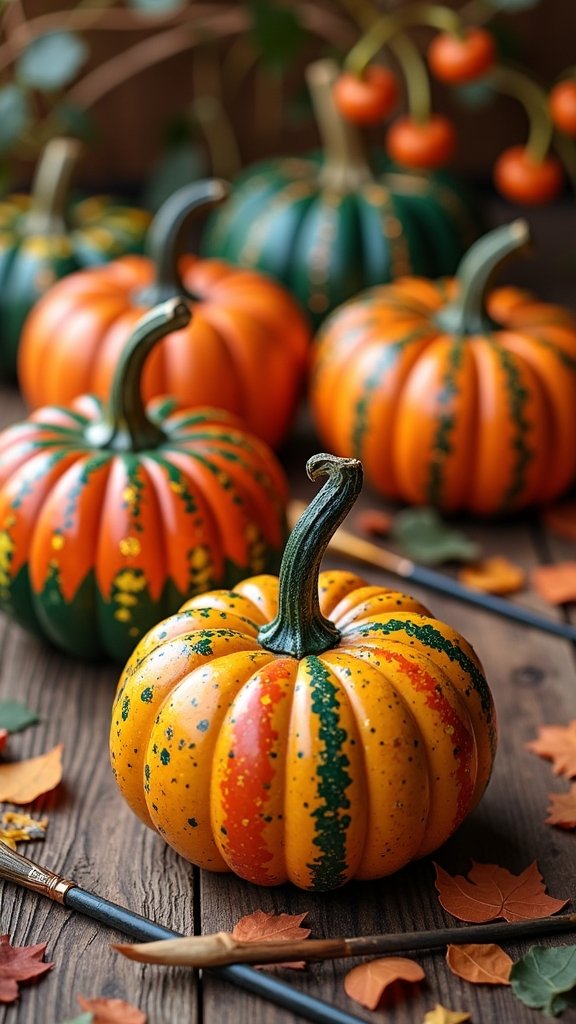
Little bumpy gourds look amazing with simple speckles, like the ones in the photo. Dip an old toothbrush in paint and flick the bristles with your thumb.
Want ideas for older kids? Try painting a cat face, an owl, or bold geometric shapes. Teens usually love doing something a bit more grown-up than a goofy face.
A painted pumpkin that hasn’t been cut can last for weeks, while carved ones often start getting soft within days. That’s a big win if you decorate early.
Spray them with a clear sealer once they’re dry if they’re going outside. Rain and dew can make acrylic paint peel right off.
2. No-Carve Pumpkin Monster Faces
This is the perfect pumpkin craft for little ones. No knives, no goo, just silly monster faces made from whatever’s in the craft box.
Give each kid a small pumpkin and let them pick their monster parts. Googly eyes, felt mouths, pipe cleaner antennae, paper teeth and yarn hair all work.
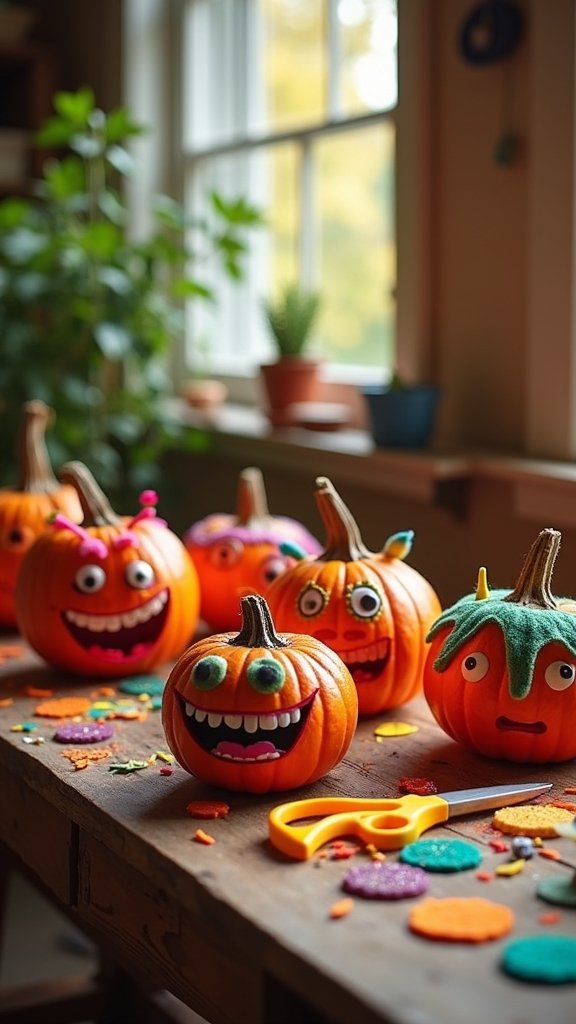
Glue the pieces on with craft glue, or use a low-temperature glue gun for older kids with an adult nearby. Big pointy paper teeth always get a laugh.
Line them up on the porch steps or the kitchen windowsill, like a little monster family. Everyone’s pumpkin ends up totally different, which is the best part.
Painting the whole pumpkin first, like green or purple, makes it look even more like a monster. Just let the paint dry before gluing anything on.
3. Puffy Paint Pumpkin Creations
Puffy paint is so fun to make, and kids love how squishy and fluffy it feels. It dries puffy and raised, almost like frosting on a cake.
Mix equal parts shaving cream and white school glue in a bowl, then stir in a few drops of orange paint or food coloring. That’s it, your puffy paint is ready.
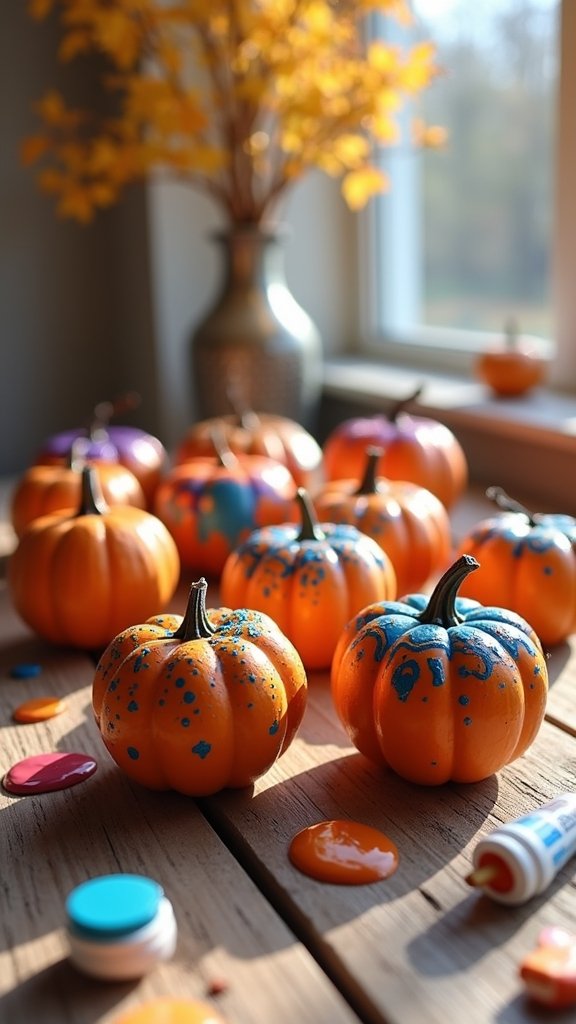
Cut pumpkin shapes from thick cardboard or card stock and let the kids spread the paint on with a spoon, brush or their fingers. You can also dab it right onto small real pumpkins like the ones in the photo.
Add a green paper stem, a few googly eyes or a sprinkle of glitter before it dries. It takes a few hours to dry fully, so leave them somewhere flat overnight.
Keep it away from little mouths, because shaving cream really isn’t something you want them tasting. And do this one on a covered table, since it’s very much a messy-hands craft.
4. Jack-o-Lantern Potato Stamps
Potato stamps are an old-school craft, but kids still love them. Every stamp makes a little jack-o’-lantern face, and they can stamp a whole army of them.
Cut a medium potato in half so you get a flat surface. Then carve a simple jack-o’-lantern face into it, or cut away the outside so a round pumpkin shape sticks up.
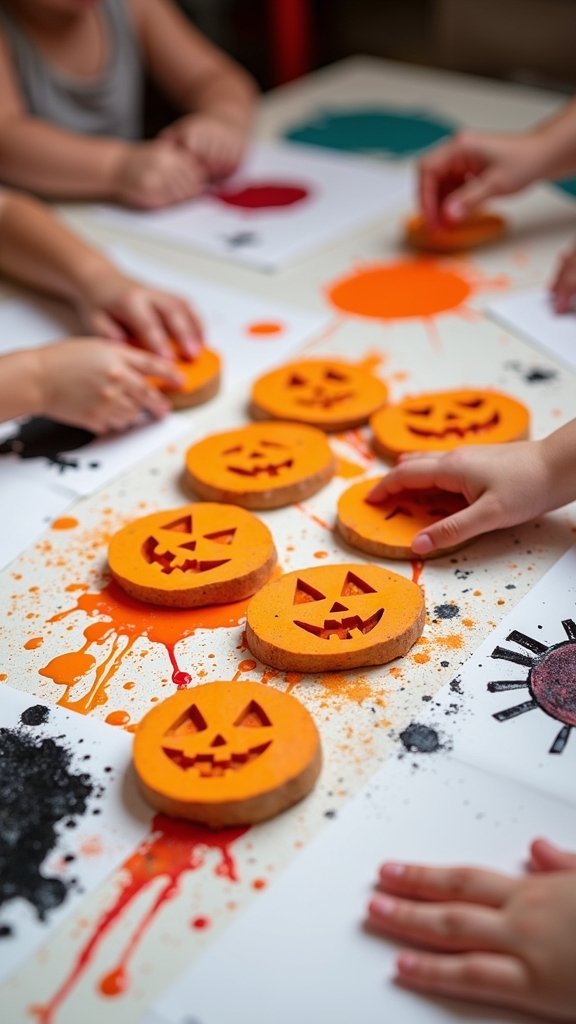
Pat the cut side dry with a paper towel first. Then dip it in orange paint and press it firmly onto paper, a gift bag or a plain tote bag.
Once the orange is dry, kids can add faces with a black marker, or carve a second smaller potato for green stems. Stamping in rows makes great homemade wrapping paper.
The carving is a job for grown-ups only. Potatoes are slippery, so hold them flat on a cutting board and keep fingers well away from the knife.
5. Handprint Pumpkin Photo Keepsake
This one is pure cuteness. Your kid’s orange handprint becomes a pumpkin, and their smiling face sits right in the middle.
Paint your child’s palm and fingers orange and press it onto card stock, fingers together. Turn it so it looks like a round pumpkin, and add a green stem at the top.
Credit ‐ Kids Fantasyland
The video above shows an easy pumpkin handprint craft for kids, so it’s a nice one to watch together first. Little ones like seeing what they’re about to make.
Once the paint dries, glue a small cut-out photo of your child’s face in the middle. Then let them decorate around it with leaves, glitter or silly drawings.
Date the back and keep it. Honestly, this is the kind of craft you’ll find in a drawer years later and get a little teary about.
Have wet wipes ready before you paint that hand. Kids touch everything the second their hand is covered in paint.
Spooky Decor You Can Make Together
6. Halloween Bottle and Milk Jug Lanterns
Empty bottles and milk jugs make the easiest glowing lanterns. Put a light inside and suddenly you’ve got little ghosts and spiders glowing on your table or porch.
Wash out clear glass bottles or plastic milk jugs and take off the labels. Then draw on ghost faces, spiders or jack-o’-lantern faces with a black permanent marker or paint.
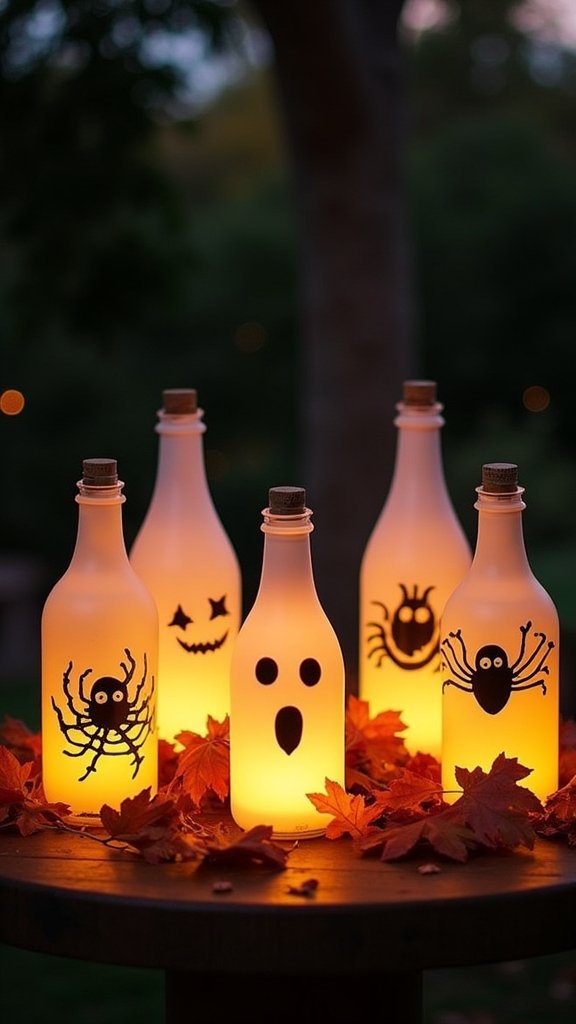
Drop a battery tea light or a small string of fairy lights inside. Frosted or white bottles like the ones in the photo give that soft, glowing look.
Plastic milk jugs are the safer pick for little kids, since they don’t break if they get dropped. Glass bottles are prettier for a table display, though.
Never put real candles inside plastic jugs. They’ll melt, and they can catch fire, so stick to battery lights only.
7. Spider Web Yarn Art
A big yarn spider web looks so cool hanging in a window or on a wall. And it’s really just wrapping yarn around and around.
Use a paper plate, an embroidery hoop or a few sticks tied in a cross. Wrap black yarn across the middle a few times to make the spokes, then weave a spiral from the center out.
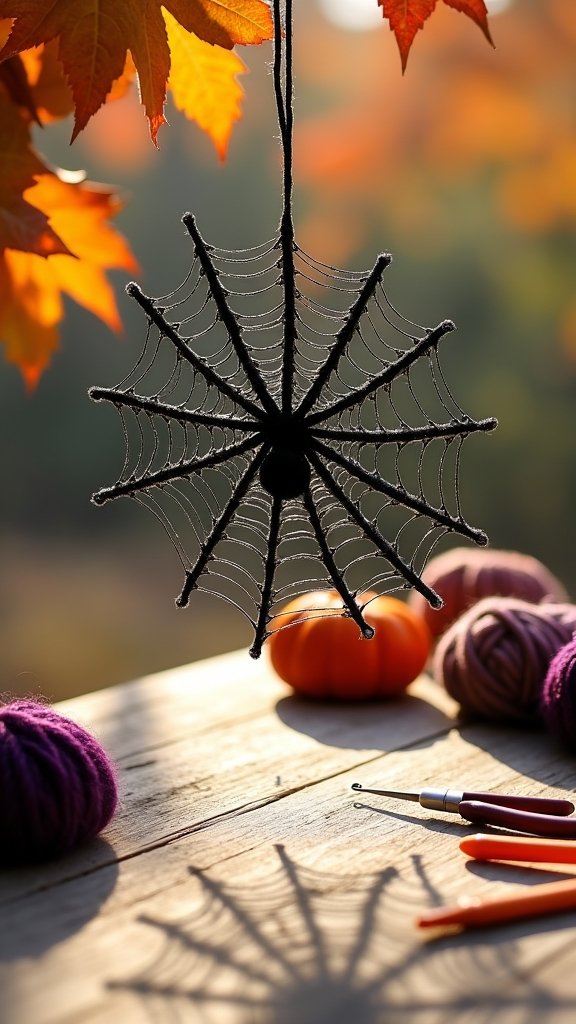
Go over and around each spoke as you spiral outward. It doesn’t need to be neat, because real spider webs are kind of messy too.
Add a plastic spider or make one from a black pom-pom and pipe cleaner legs. Hang it from a branch, like in the photo, or tape it in a window.
Tie the yarn off tightly when you’re done. Loose ends unravel fast, and then you’ve got a sad yarn pile instead of a web.
8. Foam Jack-o-Lantern Face Magnets
Foam magnets are a great fridge decoration, and kids love making pumpkin faces with them. Plus, foam is super easy to cut, even for younger hands.
Cut circles or pumpkin shapes from orange foam sheets. Then cut eyes, noses and mouths from black or purple foam and glue them on.
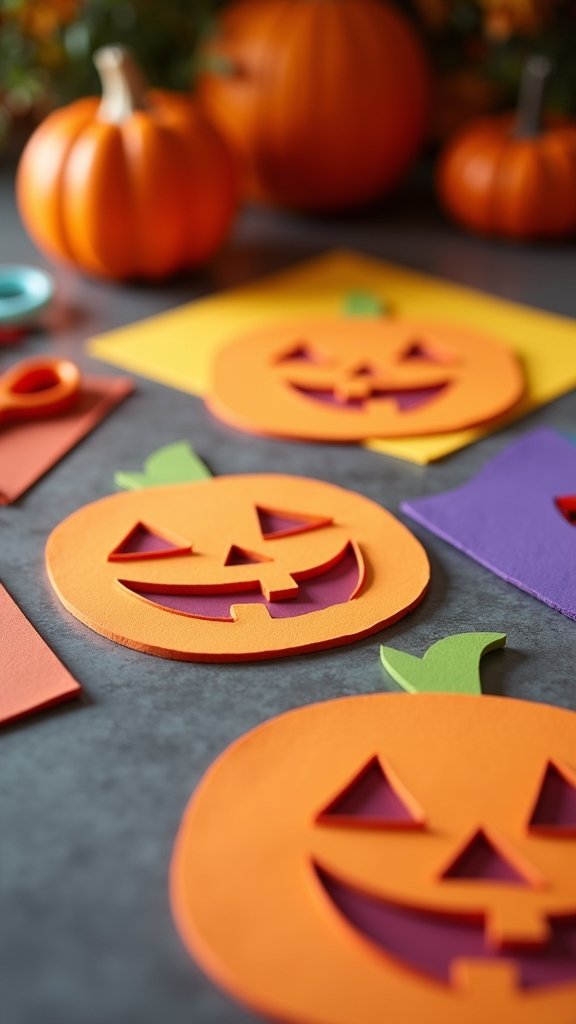
Stick a magnet strip on the back of each one. Self-adhesive magnet sheets from the craft store make this really quick.
Let kids mix up the faces. Scary, happy, sleepy, even a vampire pumpkin with little fangs.
Keep the small magnets away from toddlers. If a tiny magnet gets swallowed, it’s a real medical emergency, so the grown-ups should handle that part.
9. Pebble Spider Table Toppers
Little rock spiders crawling across your table are spooky and kind of cute. Kids find the smooth pebbles, and then you all turn them into spiders together.
Wash and dry some smooth, round pebbles. Paint them black, and maybe add a red dot or some shine with a white paint pen.
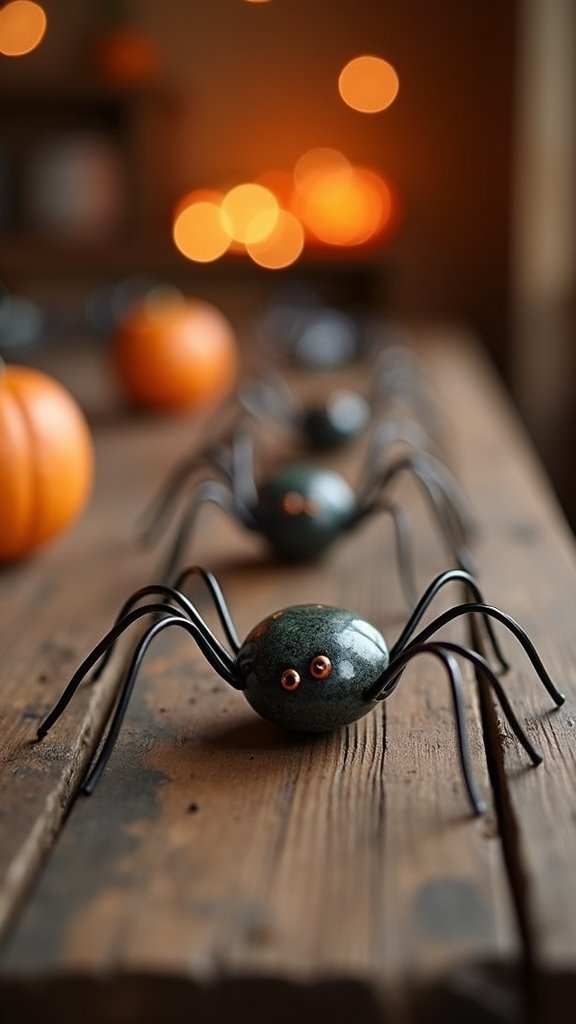
Cut black pipe cleaners into short pieces and bend them into legs. Glue four on each side of the pebble with strong craft glue.
Add tiny googly eyes or two little red dots for creepy eyes. Then scatter them across the table, a mantel or the bookshelf.
Let the glue dry overnight before anyone plays with them. Pipe cleaner legs pop off easily if the glue is still wet.
10. Toilet Roll Monster Puppets
Turn your empty toilet rolls into silly monsters. This is such a good one for using up recycling, and kids love playing with them after.
Paint each roll a bright color and let it dry. Then add big googly eyes, paper teeth, and yarn or paper strips for crazy hair.
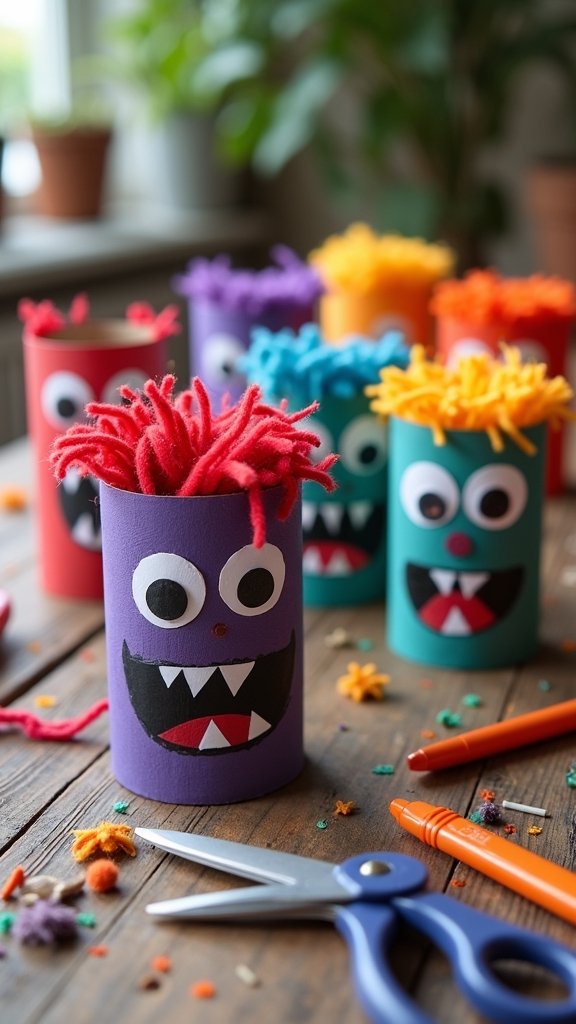
Give some monsters one eye and others three. The weirder they look, the more kids laugh.
Kids can slide their hand in from the bottom to make the puppet move. Then it’s puppet show time, which keeps them busy for ages.
Paint takes a while to dry on cardboard. Do the painting first, have a snack break, and then add the faces.
Ghosts and Mummies
11. Yarn-Wrapped Mummy Decorations
These little mummies are so easy and surprisingly cute. You just wrap white yarn around a shape and add eyes peeking out.
Use a cardboard tube, a small ball of foil, or a cut-out cardboard shape. Wrap white yarn around and around, crisscrossing so some gaps stay open.
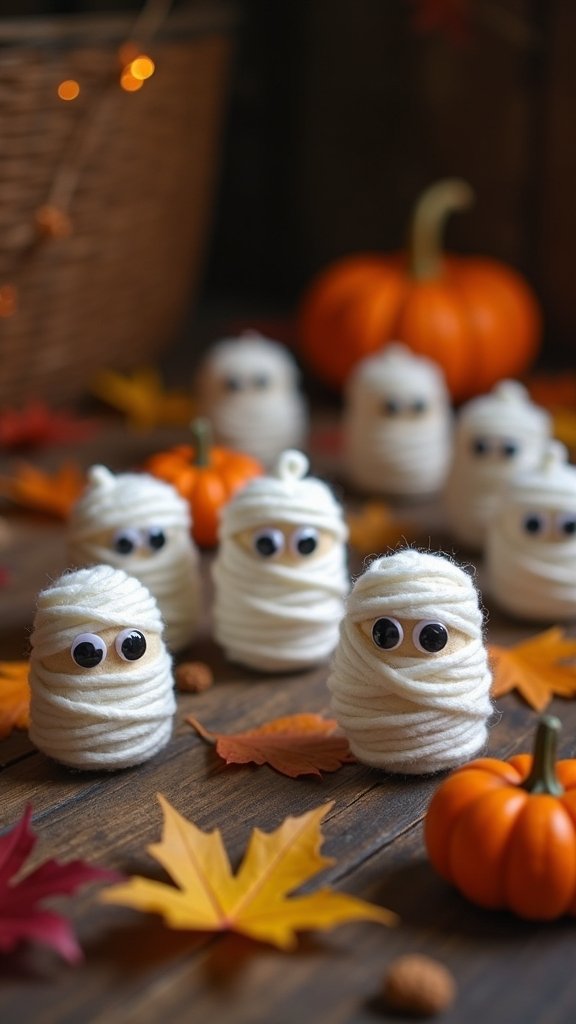
Tuck the yarn end under a few wraps so it doesn’t come loose. Then glue two googly eyes peeking through a gap in the yarn.
This is great for little hands, and the wrapping is actually good practice for fine motor skills. Plus there’s no paint, so very little cleanup.
Make a few in different sizes and group them on a shelf, like a mummy family. Honestly, they look adorable together.
12. Ghost Finger Puppets From Felt
Felt ghost finger puppets are tiny, soft and so much fun for little kids. Make a few and you’ve got a whole ghost family for puppet shows.
Cut ghost shapes from white felt, two for each puppet. Make the bottom wide enough to slide over a finger, then glue or sew the edges together, leaving the bottom open.
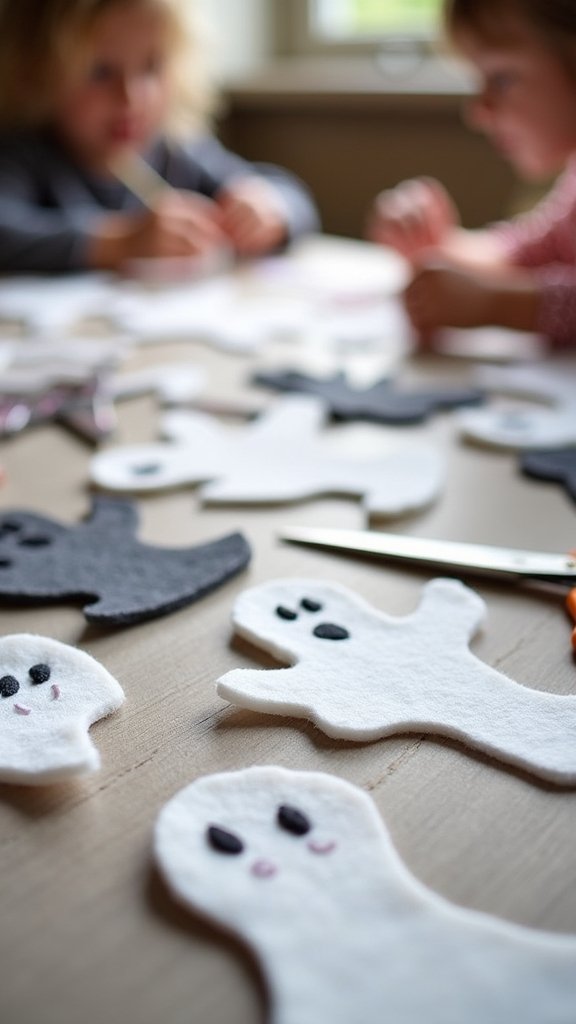
Add little black felt eyes and a mouth, or draw them on with a fabric marker. Rosy pink cheeks make them extra sweet.
Kids aged about three and up can help cut and glue with an adult watching. The grown-up should handle any sewing.
Let the glue dry fully before playing. Otherwise the ghost comes apart on the first finger.
13. Hidden Ghost Watercolor Paintings
This one feels like a magic trick. Kids draw an invisible ghost, paint over the page, and the ghost suddenly appears.
Draw a ghost on white paper with a white crayon, pressing hard. You won’t really see it, which is part of the fun.
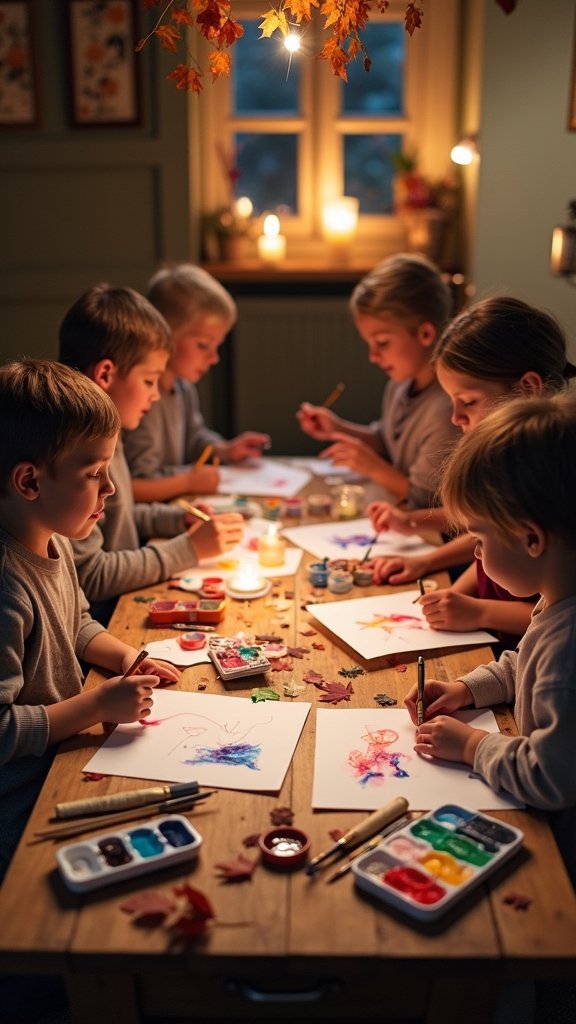
Then paint over the whole page with watercolors, like purple, blue or black. The wax pushes the paint away, and the ghost pops out white.
Grown-ups can draw secret ghosts for the kids to reveal, too. Kids go crazy for that surprise moment.
Use thicker paper or watercolor paper if you can. Thin printer paper gets soggy and tears.
14. Flying Paper Cup Ghosts
These paper cup ghosts can actually fly across the room on a string. Kids love sending them zooming back and forth.
Paint paper cups white, or use plain white cups. Draw ghost faces on them with a black marker, then tape strips of white tissue paper or cloth to the rim so they flow behind like a ghost’s body.
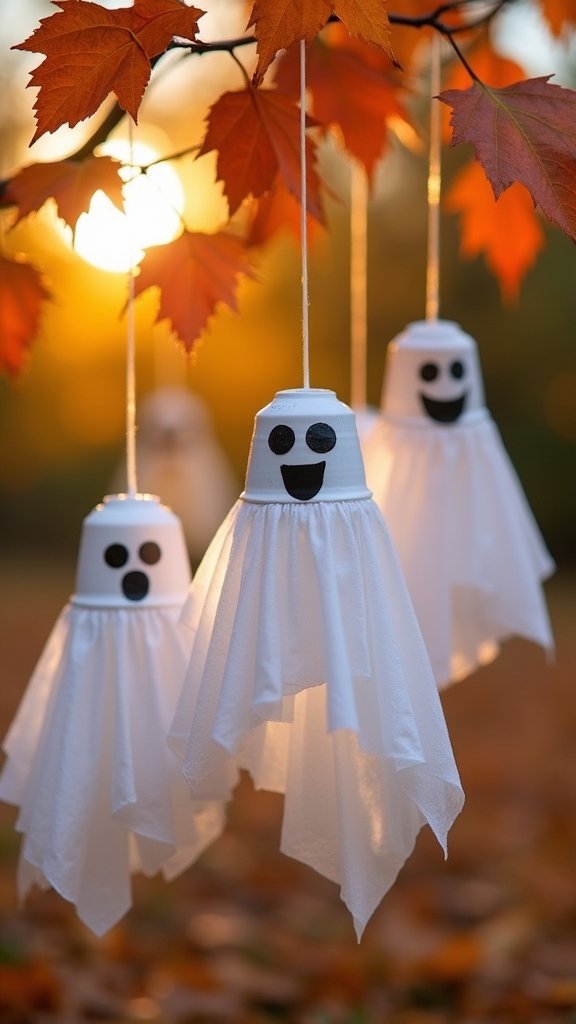
Poke a small hole in the bottom of each cup and thread yarn through it. Tie the yarn between two chairs, tip it at an angle, and the ghost slides down.
You can also hang them from a tree branch outside, like the ones in the photo. They sway in the wind and look really spooky.
Make the hole small and use a grown-up for the poking. Pencils and scissors can slip right through the cup into a hand.
15. Sock Ghosts for Spooky Fun
Finally, a use for all those lonely odd socks. White socks make the cutest little ghosts.
Stuff the toe of a white sock with cotton balls or a bit of stuffing. Tie it off with string or a rubber band to make the head.
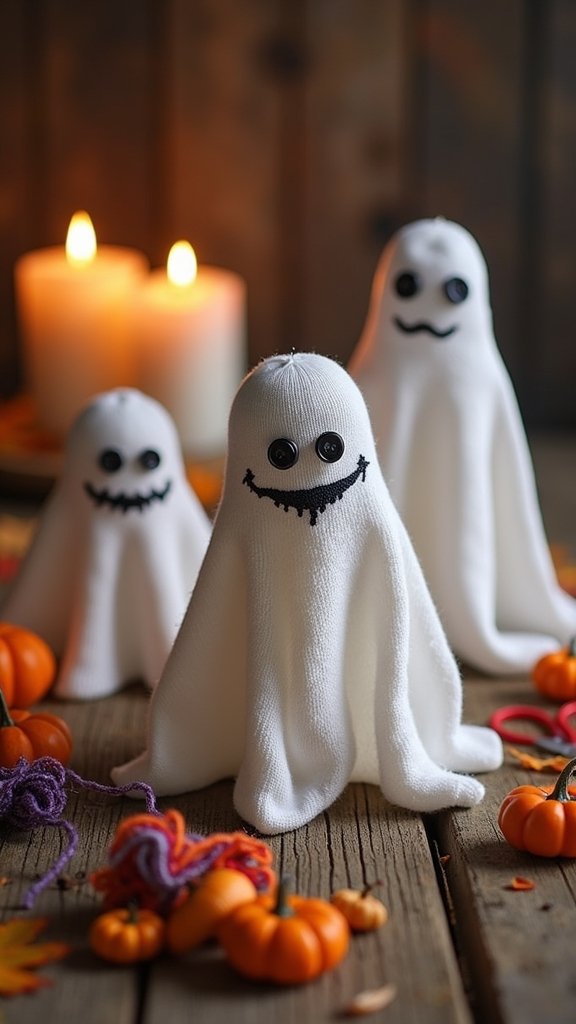
Let the rest of the sock hang down like the ghost’s body. Then draw on a face with a black fabric marker or glue on felt eyes.
Kids can use them as decorations, puppets or even game pieces. They also look sweet guarding a candy bowl.
If you want them to stand up like the ones in the photo, add a small handful of rice in the bottom before tying. Just keep the rice inside if there are little ones around.
Paper and Art Projects
16. Origami Halloween Bookmarks
Corner bookmarks are a fun Halloween craft for kids who like folding paper. They slip over the corner of a page and look like a little monster munching on the book.
Start with a square of colored paper. Follow the folds to make a small pocket that fits over a book corner.
Credit ‐ Craft Factory
The video above walks through easy DIY bookmark ideas for kids. Watching someone make one first makes the whole thing feel way easier.
Once you’ve got the pocket, turn it into a pumpkin, a ghost, a bat or a monster with paper eyes, teeth or ears. Older kids can make a whole set for friends.
Use thin, crisp paper for folding. Thick card stock cracks at the folds and won’t sit flat on the page.
17. Fabric Candy Corn Collage
Candy corn is one of those Halloween symbols everyone recognizes. And making it from fabric scraps is a nice, calm craft for kids.
Cut big triangles from paper or card stock. Then cut small pieces of yellow, orange and white fabric or felt.
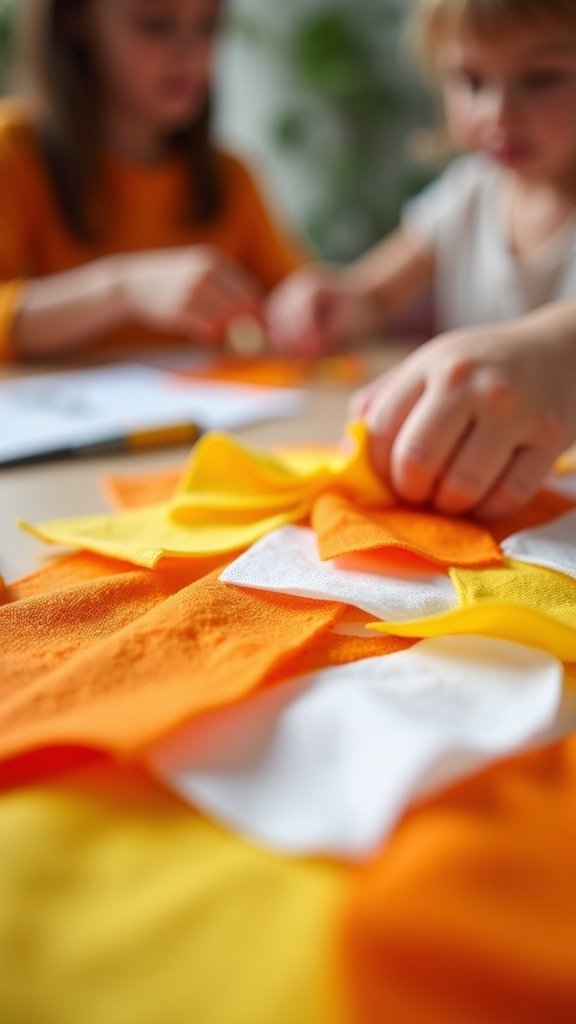
Glue the yellow pieces on the wide bottom, orange in the middle, and white at the tip. Overlapping the scraps a little makes it look rich and textured.
This works great for groups, too. Each kid makes one big piece, and you hang them all together on the wall like a giant candy corn garland.
Use child-safe scissors for the fabric, but know that kids’ scissors struggle with fabric. Felt cuts much more easily, so it’s a better pick for younger kids.
18. Stained Glass Pumpkin Suncatchers
These pumpkin suncatchers glow so beautifully when the sun shines through them. They’re one of the prettiest crafts on this list.
Cut a pumpkin shape from black paper and cut out the middle, leaving a thick frame. Stick it onto the sticky side of a piece of clear contact paper.
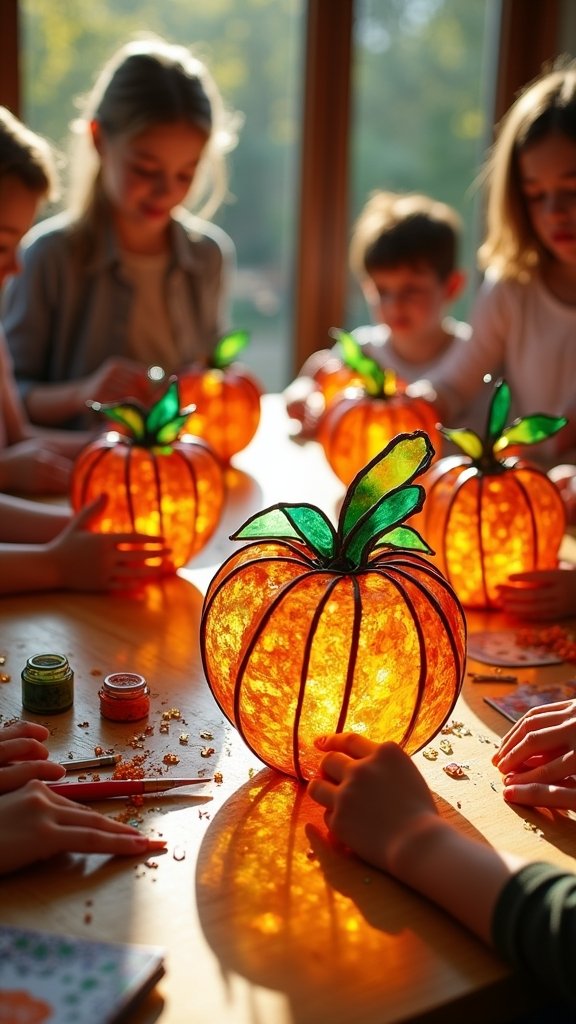
Tear orange, yellow and green tissue paper into little pieces. Then press them inside the frame, overlapping colors so they mix.
Cover it with another sheet of contact paper and trim around the edges. The photo shows how warm these look when light shines through, even indoors with the lamp on.
Hang them in a sunny window with clear tape. And keep the sticky contact paper away from little ones’ hair, because it’s a pain to get out.
19. Creepy Crawly Placemats
Turn your dinner table into a spooky bug party. Creepy crawly placemats are a fun way for kids to help set the table for a Halloween meal.
Kids can draw and color spiders, bats and beetles on big pieces of paper to make their own placemats. Or you can decorate plain round placemats with plastic spiders, like the one in the photo.
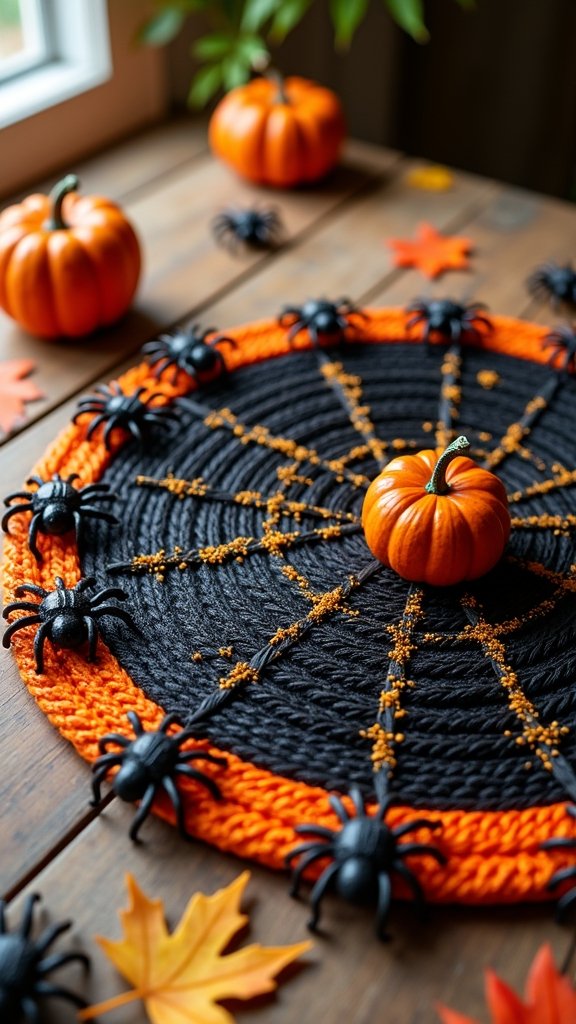
Lay the placemats on the table with a few mini pumpkins and fall leaves around them. It makes even a normal Tuesday dinner feel festive.
Laminate the paper ones, or cover them with clear contact paper, so they survive spills. Then they last all of October.
Plastic spiders are small, so keep them off the table when toddlers are eating. Kids that age put everything in their mouths.
20. Paper Plate Witch Masks
Paper plate masks are a classic for a reason. They’re cheap, quick and every kid can make a totally different witch.
Paint a paper plate green or purple and cut out two eye holes. Then make a pointy hat from black paper and glue it on top.
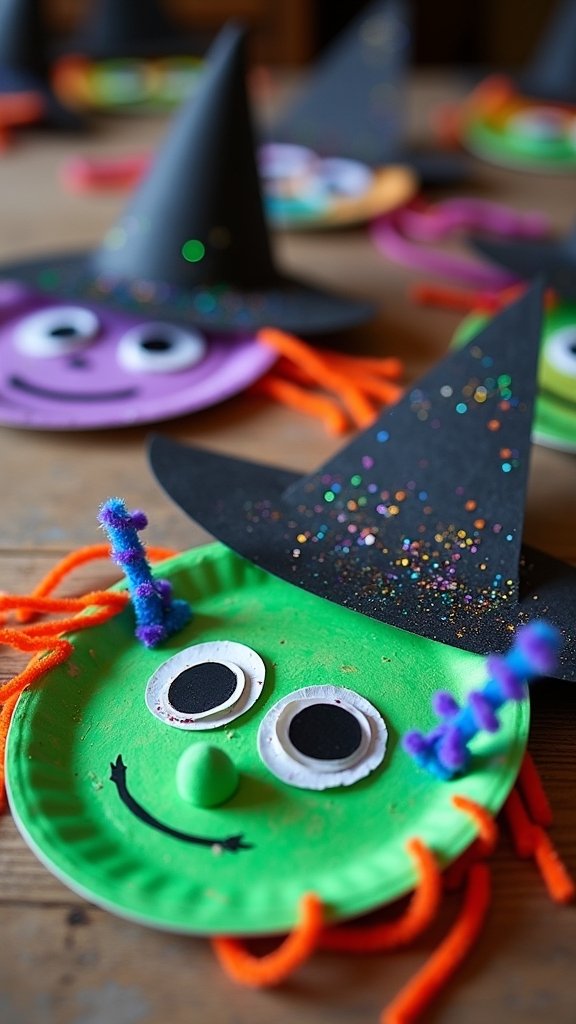
Add hair made from yarn or orange pipe cleaners, and a funny nose or a big smile. Glitter on the hat is always a hit.
Tape a craft stick to the bottom so kids can hold it up, or add elastic to wear it. They’ll want to wear them all day.
Make the eye holes big enough to see out of properly. And don’t let kids wear masks while walking around outside in the dark, because they can’t see where they’re going.
That’s pretty much the list
Twenty Halloween crafts, and you don’t need to do them all. Pick a couple that fit your kids and your weekend.
If you have toddlers, start with sock ghosts or yarn mummies. For mess-loving kids, go for puffy paint pumpkins or potato stamps. And if you want something that looks amazing in the window, make the stained glass pumpkin suncatchers.
Don’t worry if everything comes out a bit wonky. Halloween crafts are supposed to look homemade, and that’s half the charm.
So which one are you making first?